


CDP part 4: user management on CDP Public Cloud with Keycloak

Jul 4, 2023
Never miss our publications about Open Source, big data and distributed systems, low frequency of one email every two months.
Previous articles of the serie cover the deployment of a CDP Public Cloud environment. All the components are ready for use and it is time to make the environment available to other users to explore all the services and run their experiments.
This article is the fourth in a series of six:
- CDP part 1: introduction to end-to-end data lakehouse architecture with CDP
- CDP part 2: CDP Public Cloud deployment on AWS
- CDP part 3: Data Services activation on CDP Public Cloud environment
- CDP part 4: user management on CDP Public Cloud with Keycloak
- CDP part 5: user permission management on CDP Public Cloud
- CDP part 6: end-to-end data lakehouse usecase with CDP
Onboarding users to work on a CDP environment and services, is achieved in two ways, by configuring an identity provider or by importing users in bulk.
This article focus on configuring Keycloak as an Identity Provider (IdP) for CDP. Keycloak enables us to set up identity federation with CDP since it supports Security Assertion Markup Language (SAML 2.0) protocol. Identity federation allows users to login into the CDP console through Keycloak authentication without registering with Cloudera or creating a Cloudera account.
Onboarding users and configuring Keycloak as an Identity Provider for CDP is done via the Keycloak web interface (Admin console) or using the terminal. Both approaches are covered.
From the side of CDP, Account administrator or PowerUser roles are required to complete this process.
Deploy Keycloak using an AWS EC2 instance
Clearly, we need to deploy Keycloak before starting the identity provider configuration in CDP.
To deploy Keycloak with minimal installation so that users can log in using the internet, we deploy it with Docker in an AWS EC2 instance.
To do so, you need an EC2 instance with the following characteristics:
- Instance type:
t2.micro - AMI:
ami-05e9058d6cda9ba0d - Docker compose installed
- Public IP Address
- Inbound rule
8443port
Once you created the instance, take note of the following information:
- Public IPv4 DNS:
<PUBLIC_IPV4_DNS> - Public IP Address:
<ec2_public_ip> - EC2 key-pair:
<AWS_SSH_KEY>
For a complete guide to launch an AWS EC2 instance that meets these requirements, check this article Set up Keycloak in an EC2 instance.
Once your EC2 instance is ready, you are ready to start the Keycloak deployment.
Local machine:
Set the EC2 instance required variables
export PUBLIC_IPV4_DNS=<PUBLIC_IPV4_DNS>
export AWS_SSH_KEY=<AWS_SSH_KEY>
# Default username for Amazon Linux AMI
export EC2_USERNAME=ec2-user
Connect to the EC2 instance:
ssh -i "~/.ssh/${AWS_SSH_KEY}.pem" ${EC2_USERNAME}@${PUBLIC_IPV4_DNS}EC2 Instance:
Create the docker-compose.yml file:
cat <<EOF > docker-compose.yml
version: '3'
services:
  keycloak:
    # The 20.0.0 keycloak image
    image: quay.io/keycloak/keycloak:20.0.0
    container_name: keycloak
    environment:
      # Keycloak admin credentials
      KEYCLOAK_ADMIN: admin
      KEYCLOAK_ADMIN_PASSWORD: Password123
    ports:
      # The HTTPS port
      - 8443:8443
      # The HTTP port
      - 8080:8080
    command: start-dev
    volumes:
      # To save the SAML metadata file
      - ./kc_config:/kc_config
volumes:
  kc_config:
    external: true
EOF
Create the external volume folder:
mkdir kc_configLaunch the docker compose:
docker compose up -dCheck that Keycloak is running using Docker:
docker psIn order to have access to the Keycloak Admin Console (Keycloak web interface) you need to disable the SSL protocol:
-
Enter the container:
docker exec -it keycloak bash -
Add required path to use the
kcadm.shscript:export PATH=$PATH:/opt/keycloak/bin -
Give the server and the credentials for the
masterRealm:kcadm.sh config credentials --server http://localhost:8080/ \ --realm master \ --user $KEYCLOAK_ADMIN \ --password $KEYCLOAK_ADMIN_PASSWORD -
Disable the SSL for the
masterRealm:kcadm.sh update realms/master -s enabled=true -s sslRequired=none -
The Keycloak web interface its now available in the following address:
http://<ec2_public_ip>:8080.
Configuration using Keycloak Web Interface
Using the Keycloak web interface is recommended if you are not familiar with Keycloak, and you want a better understanding of how to link CDP with Keycloak.
If you prefer to start with an easy-to-reproduce approach, that allows you to do the setup and create users faster, scroll down to the Configuration Using the Terminal section.
Realm creation
Realm is one of the core concepts in Keycloak, a Realm secures and manages security metadata for a set of users.
To create a Realm:
-
Navigate to
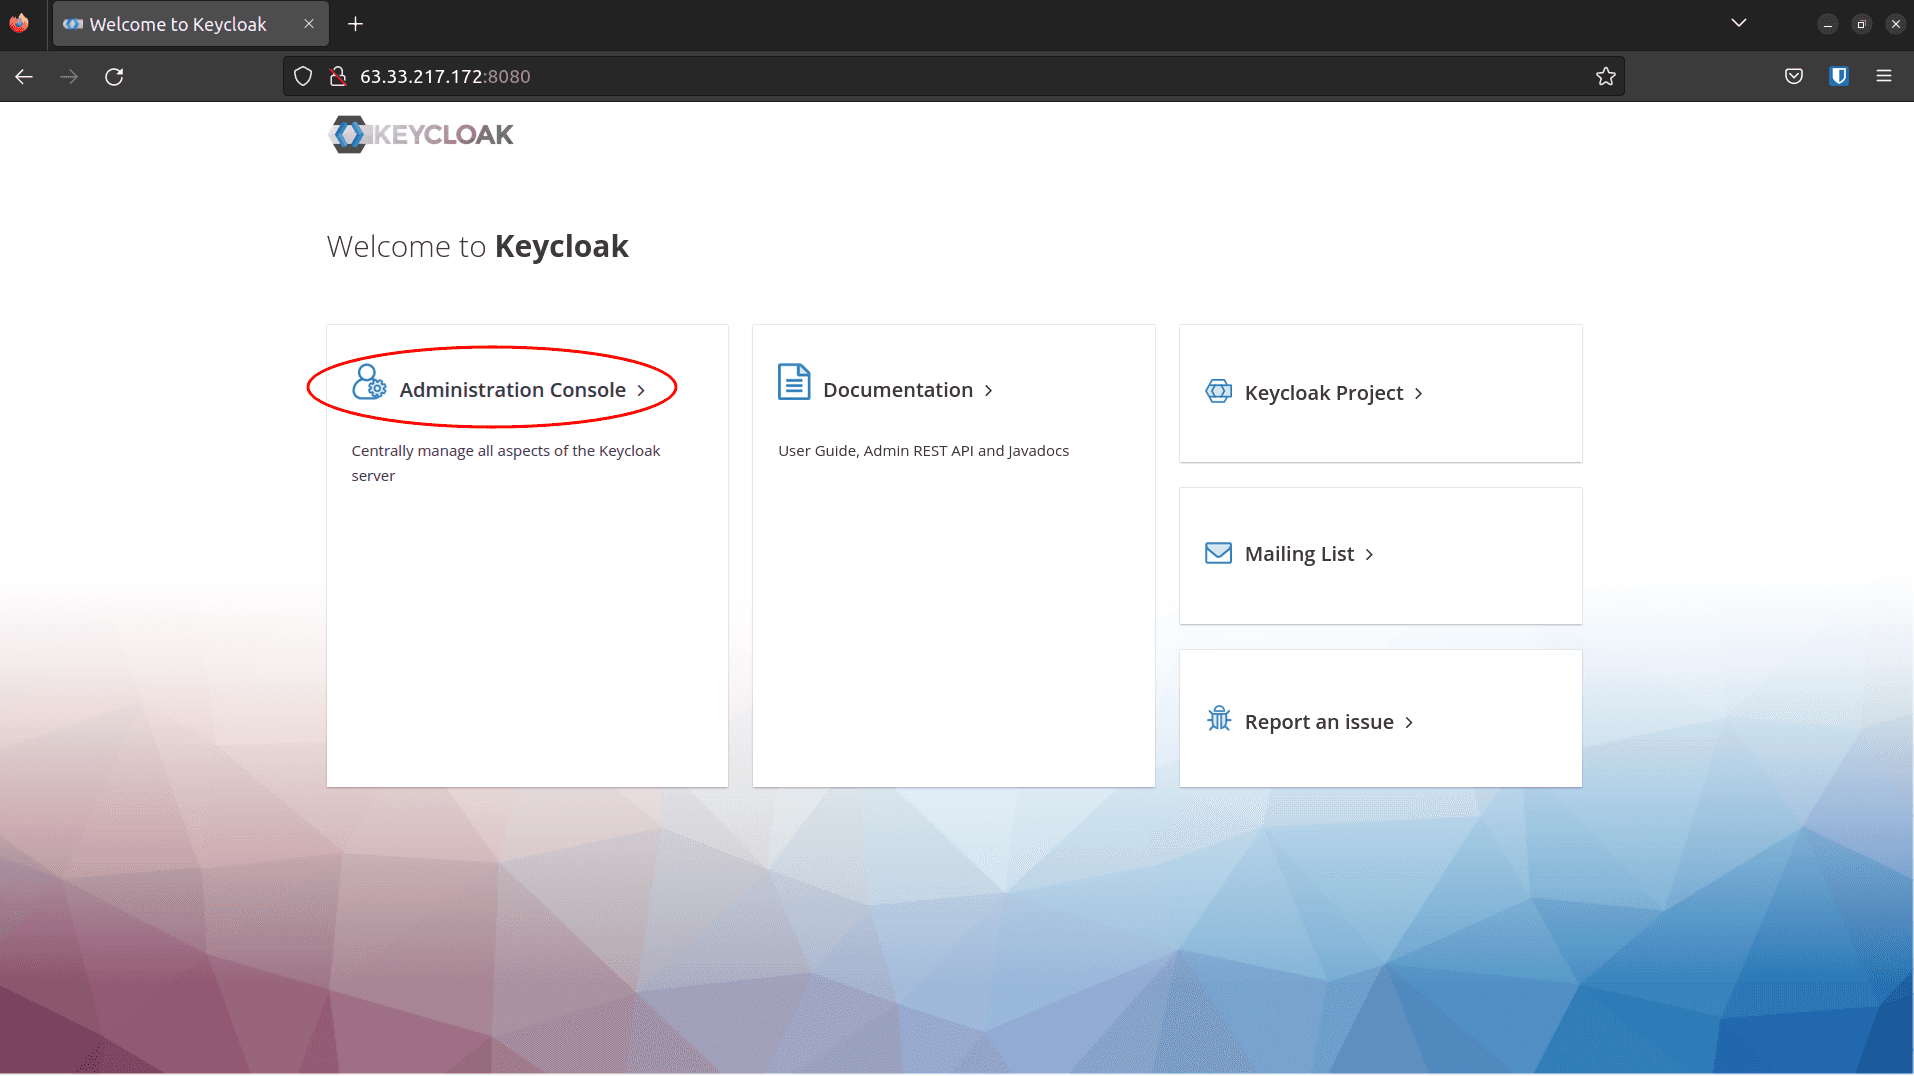
http://<ec2_public_ip>:8080, click Administration Console:
-
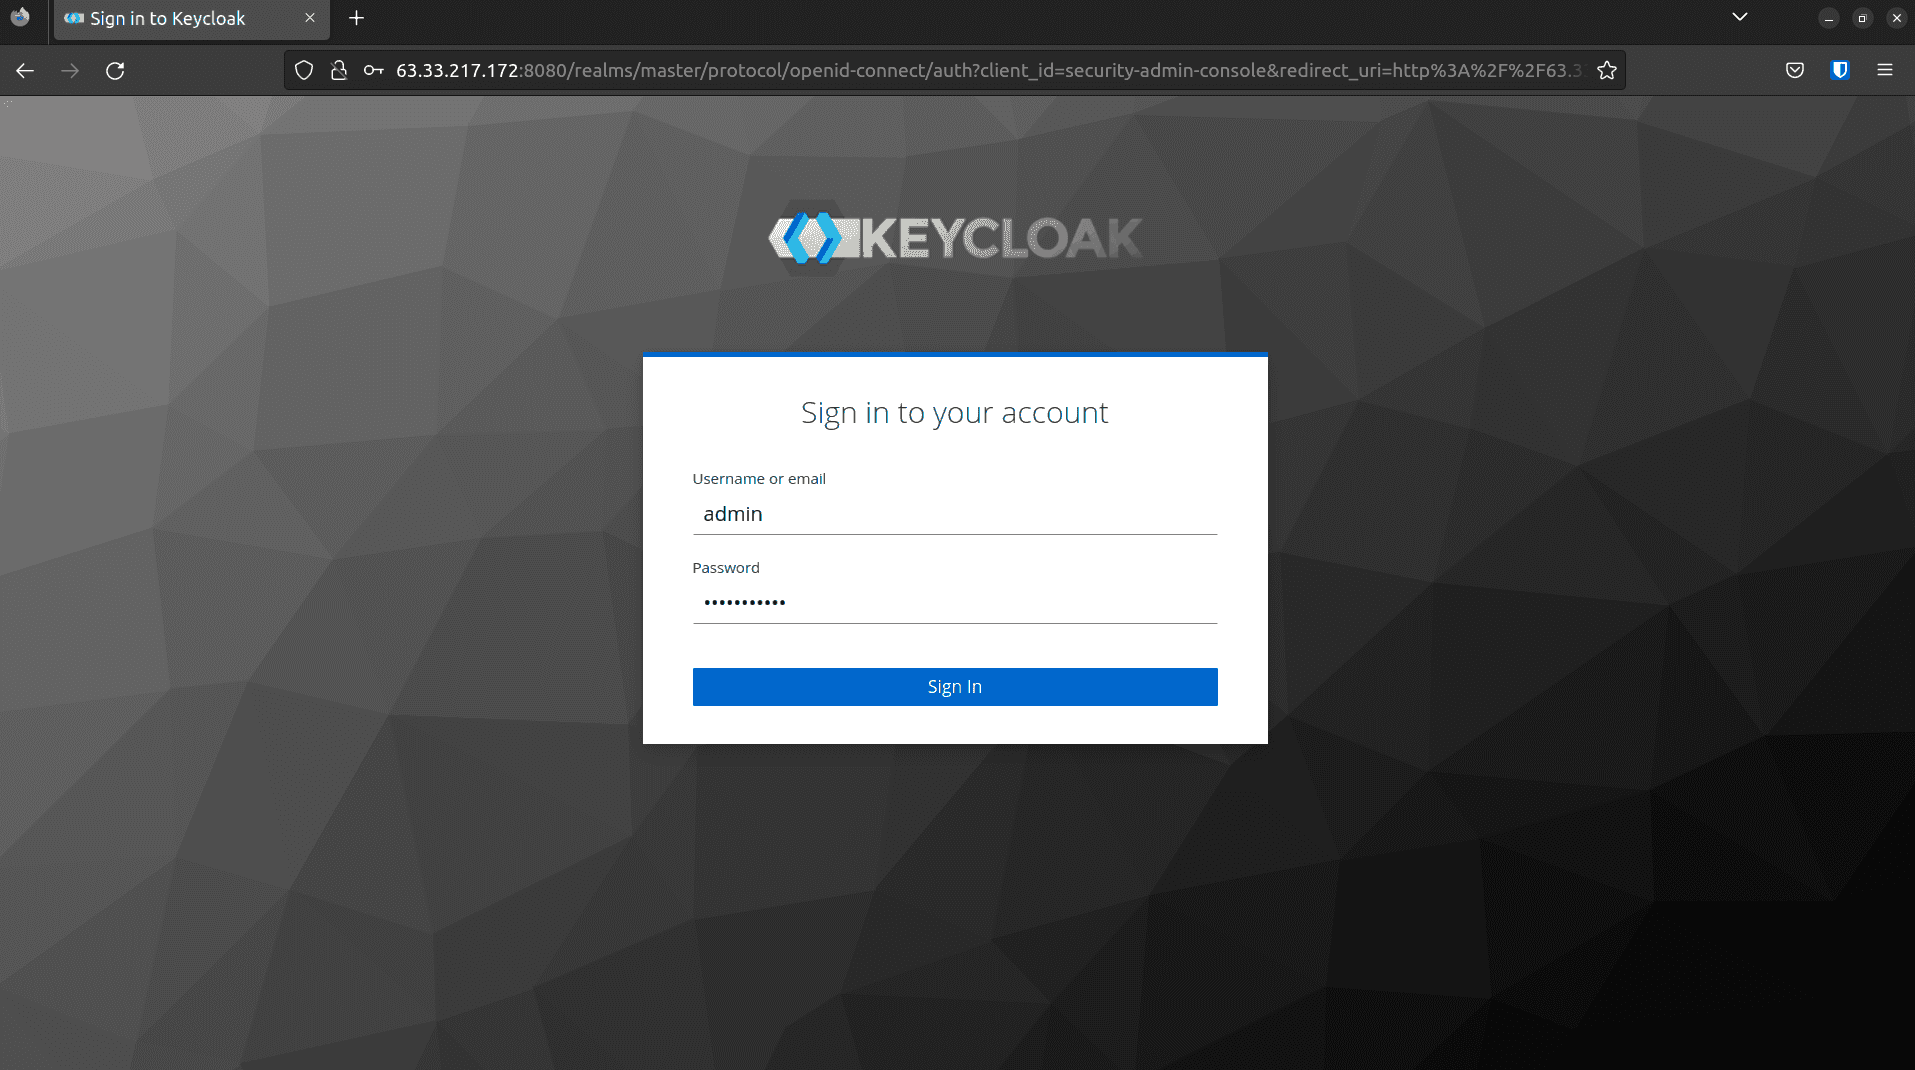
Log in using your
KEYCLOAK_ADMINandKEYCLOAK_ADMIN_PASSWORDdefined in thedocker-compose.ymlfile: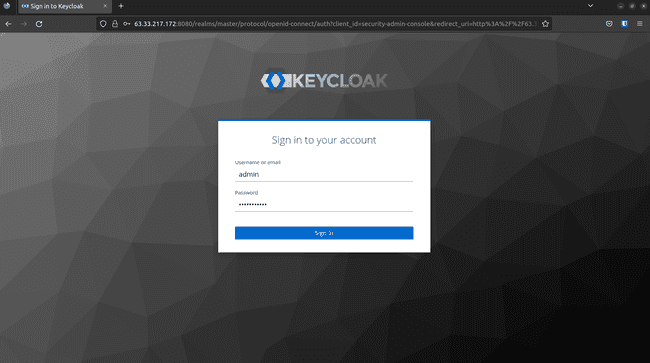
-
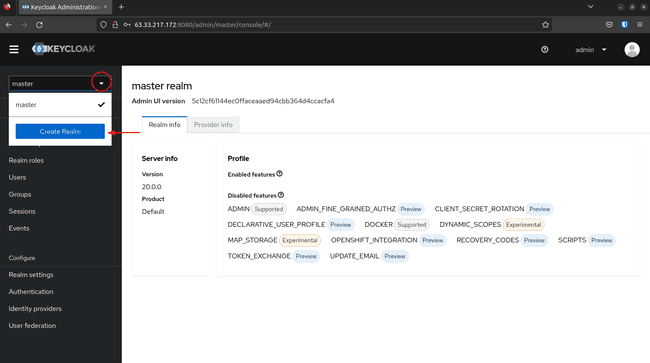
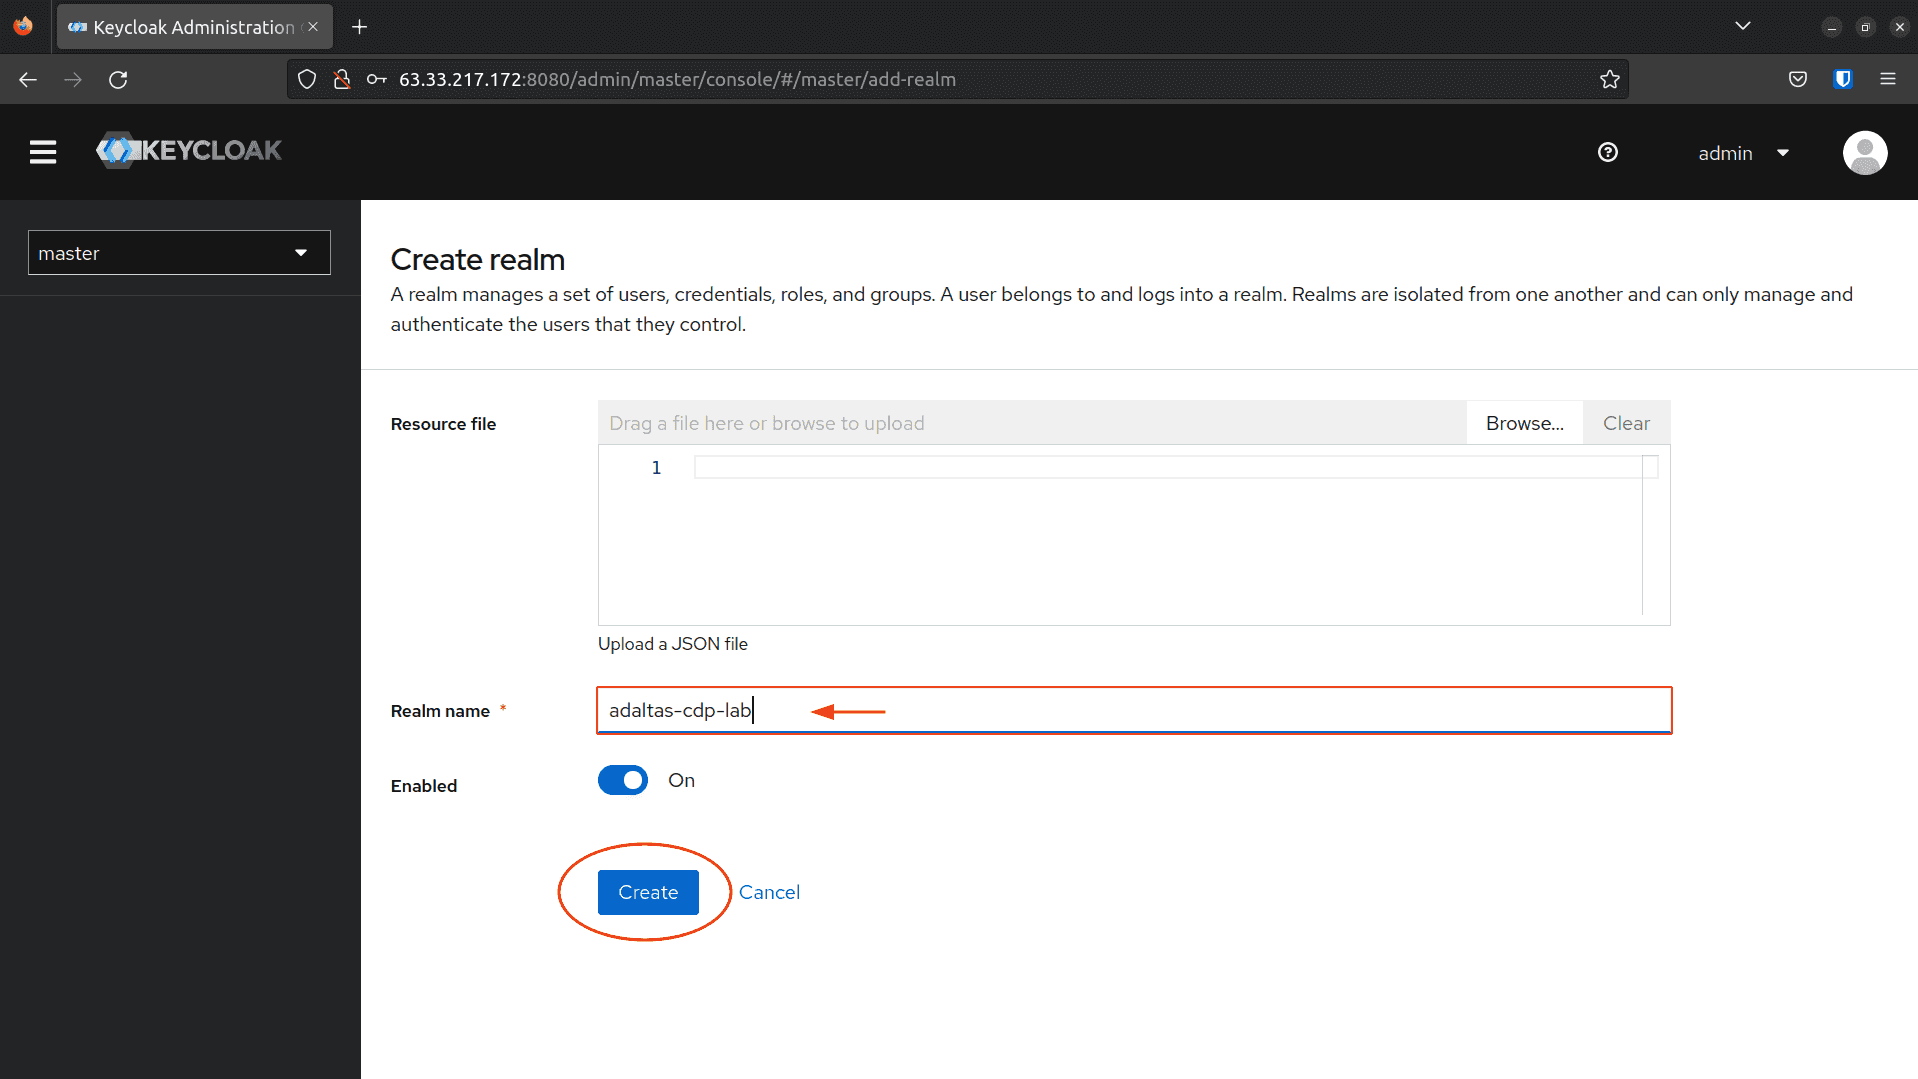
Click on the dropdown in the top-left corner where it says master, then click on Create Realm:
-
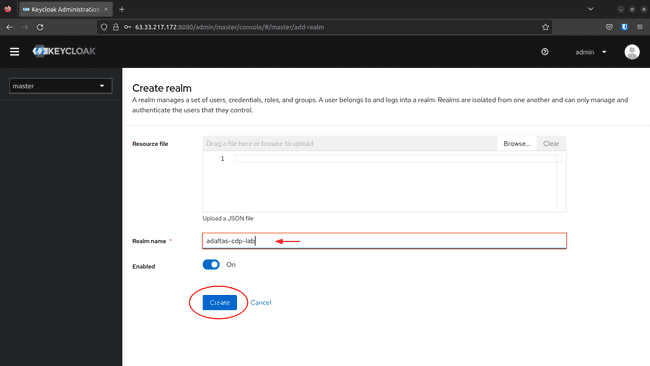
Fill the name and click Create:
-
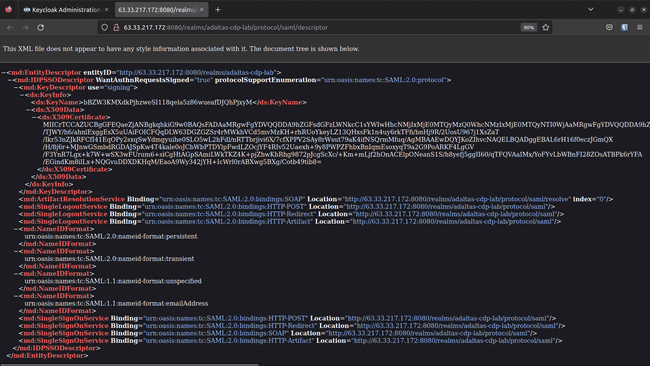
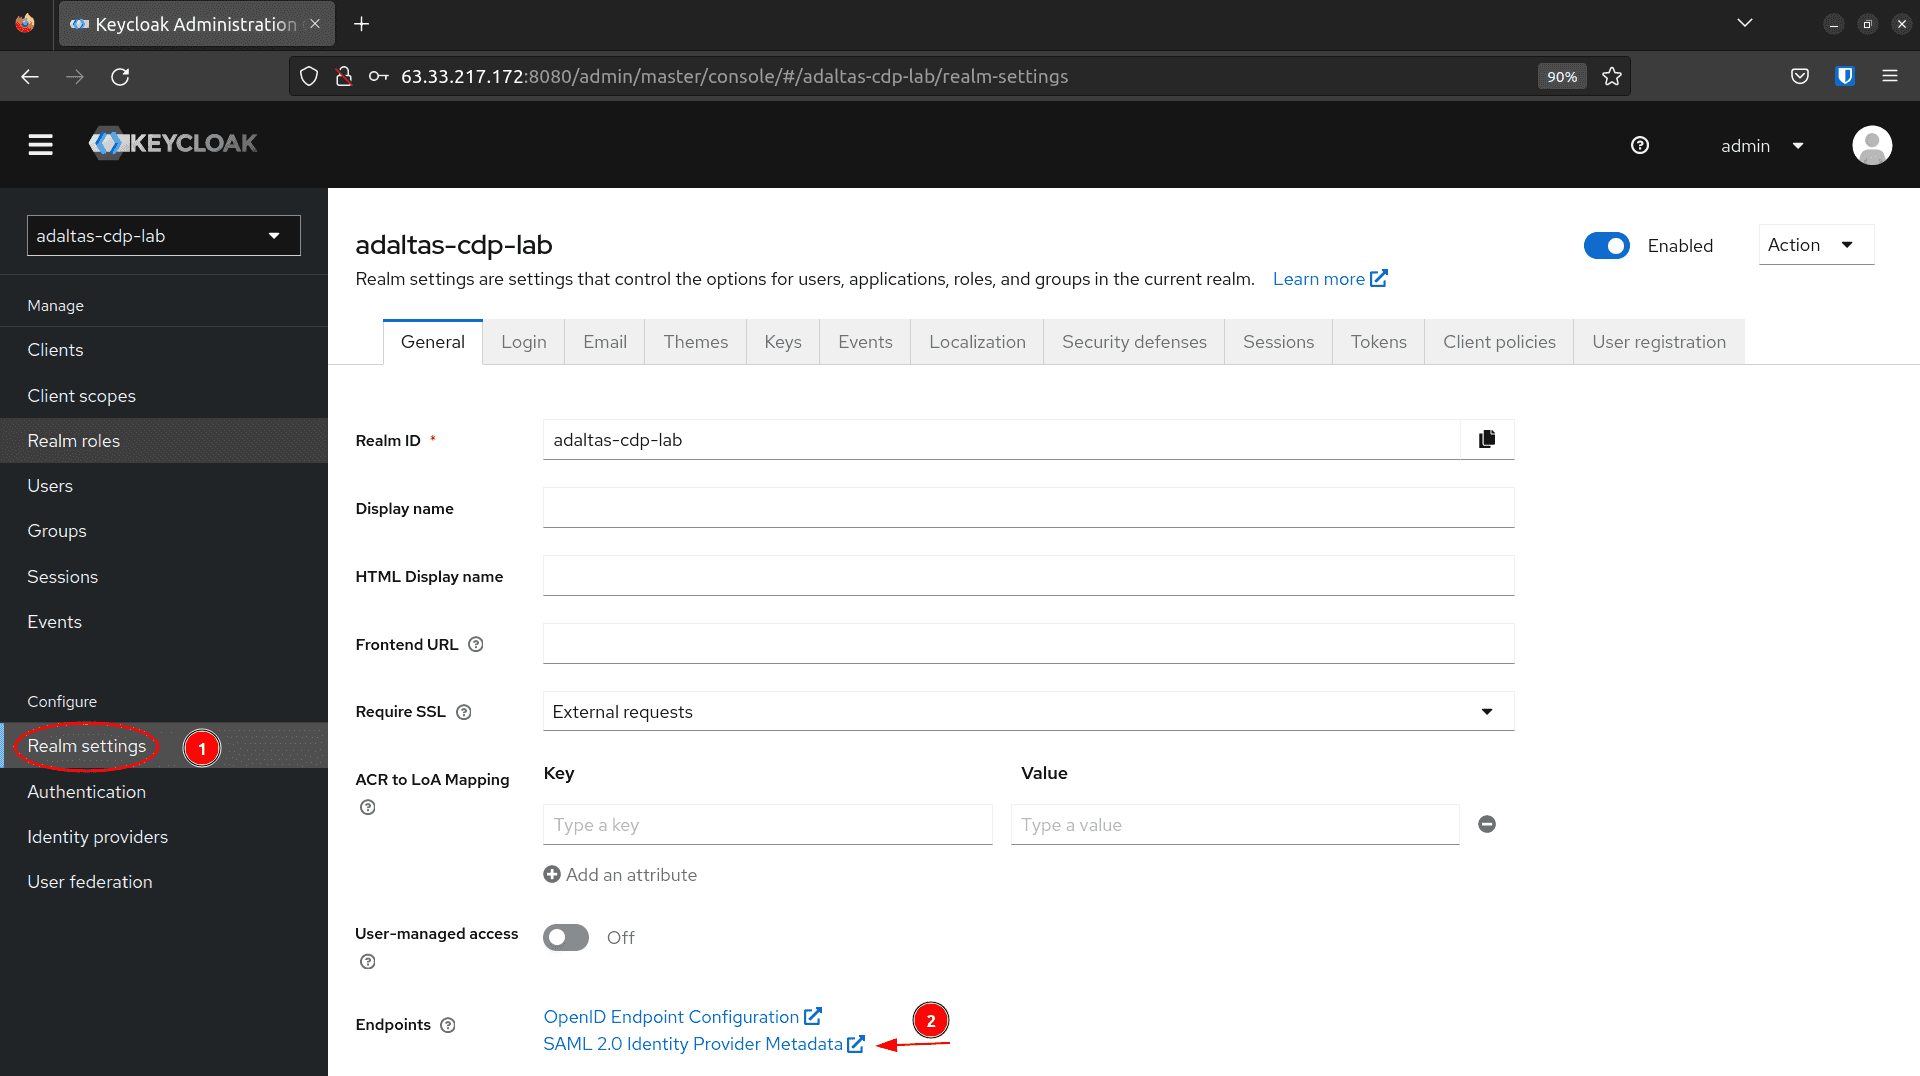
Navigate to Realm settings and click on SAML 2.0 Identity Provider Metadata:

-
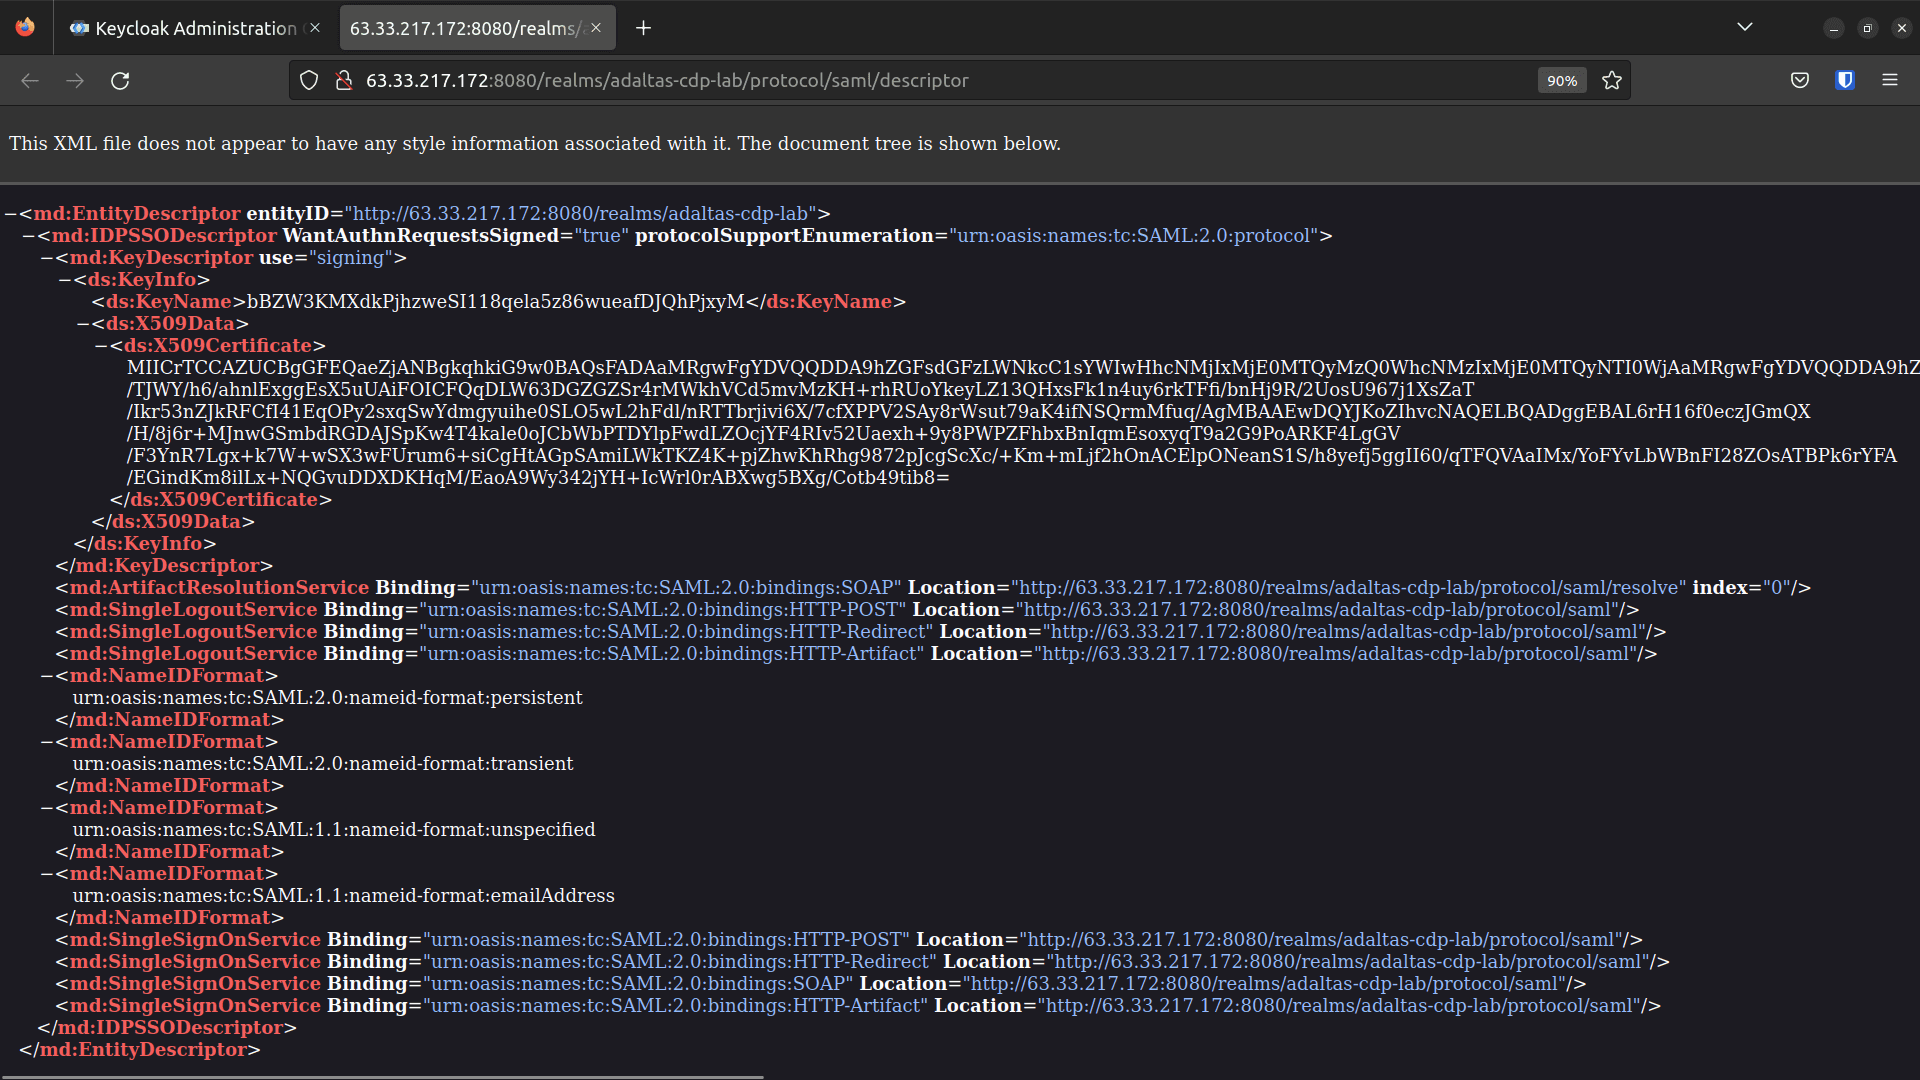
This open another tab with the SAML metadata required to register the Realm as an IdP in CDP:
-
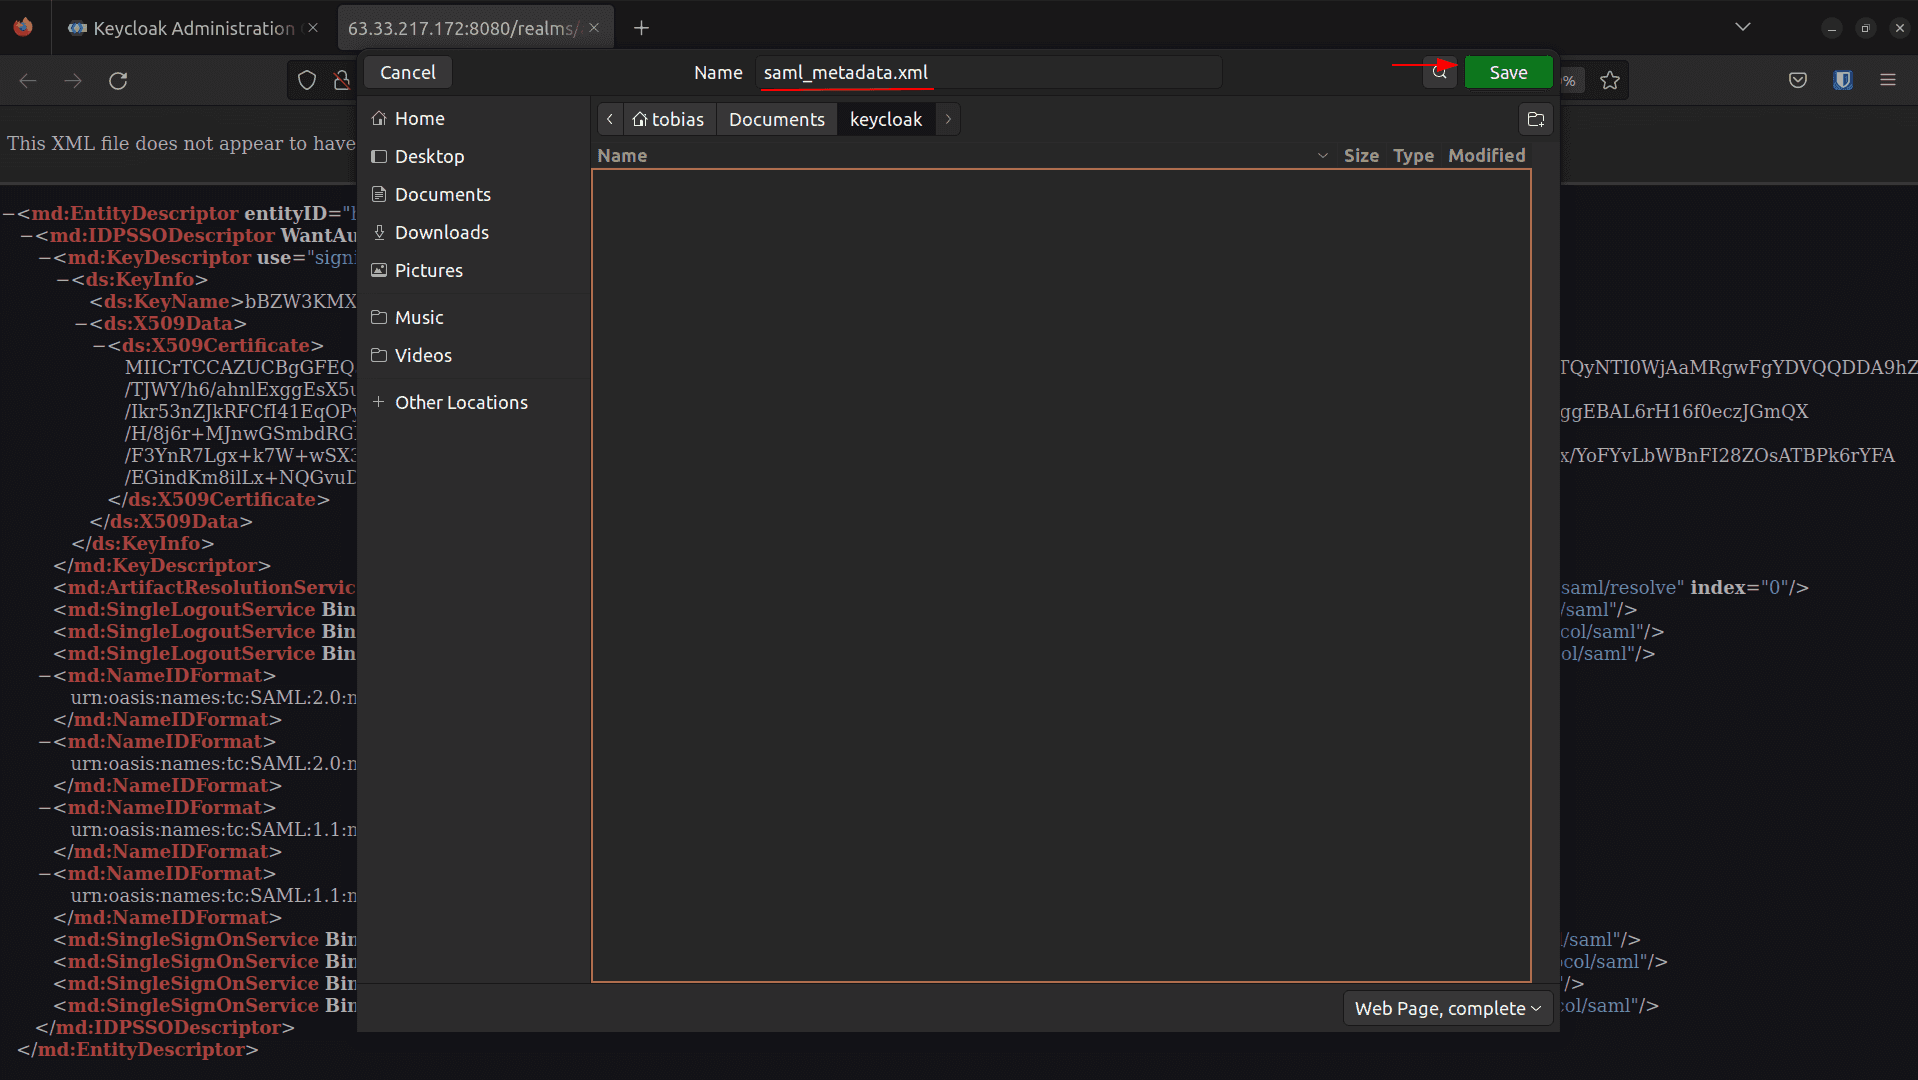
Download this file in xml format. Right click > Save Page As… > saml_metada.xml:
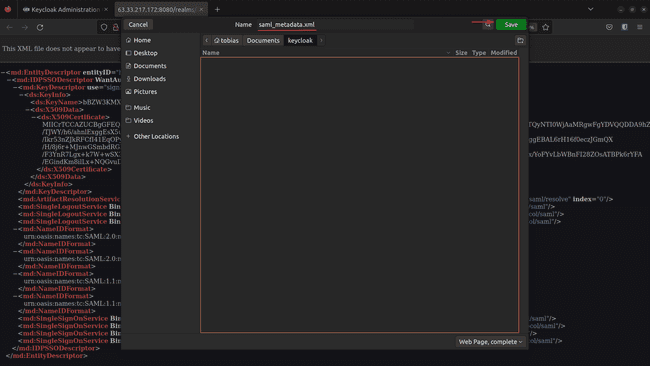
-
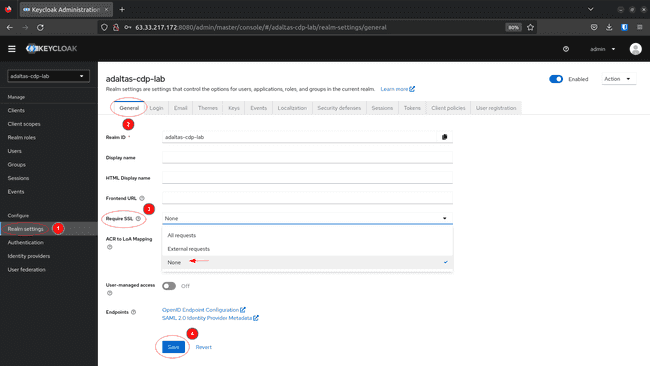
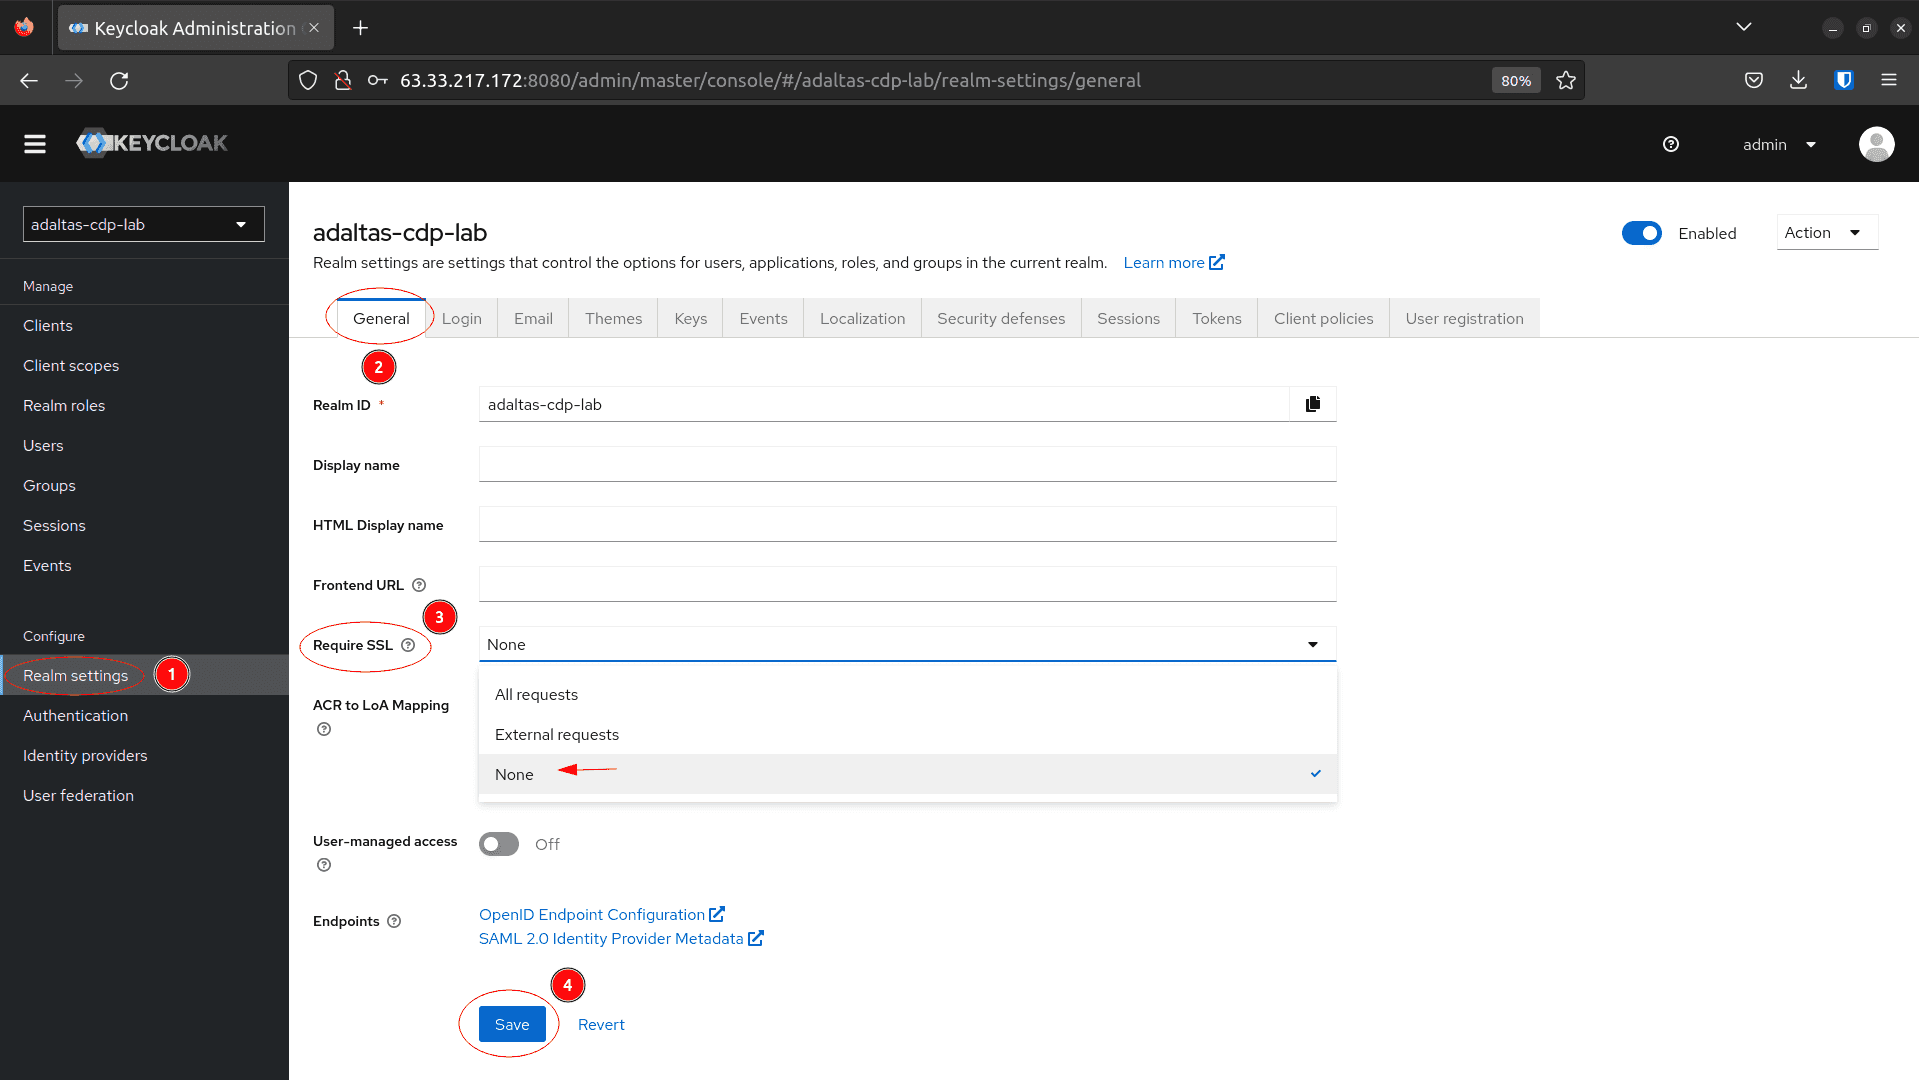
To disable the SSL requirement: go back to Realm settings select the General tab, set Required SSL to None and click on Save:

Registering Keycloak in CDP
In this step Keycloak is registered as an identity provider in CDP. This requires the previously downloaded SAML metadata file.
As a reminder, you need Account administrator or PowerUser roles in your CDP account to complete this process.
To create the Identity Provider in CDP, the following steps are needed.
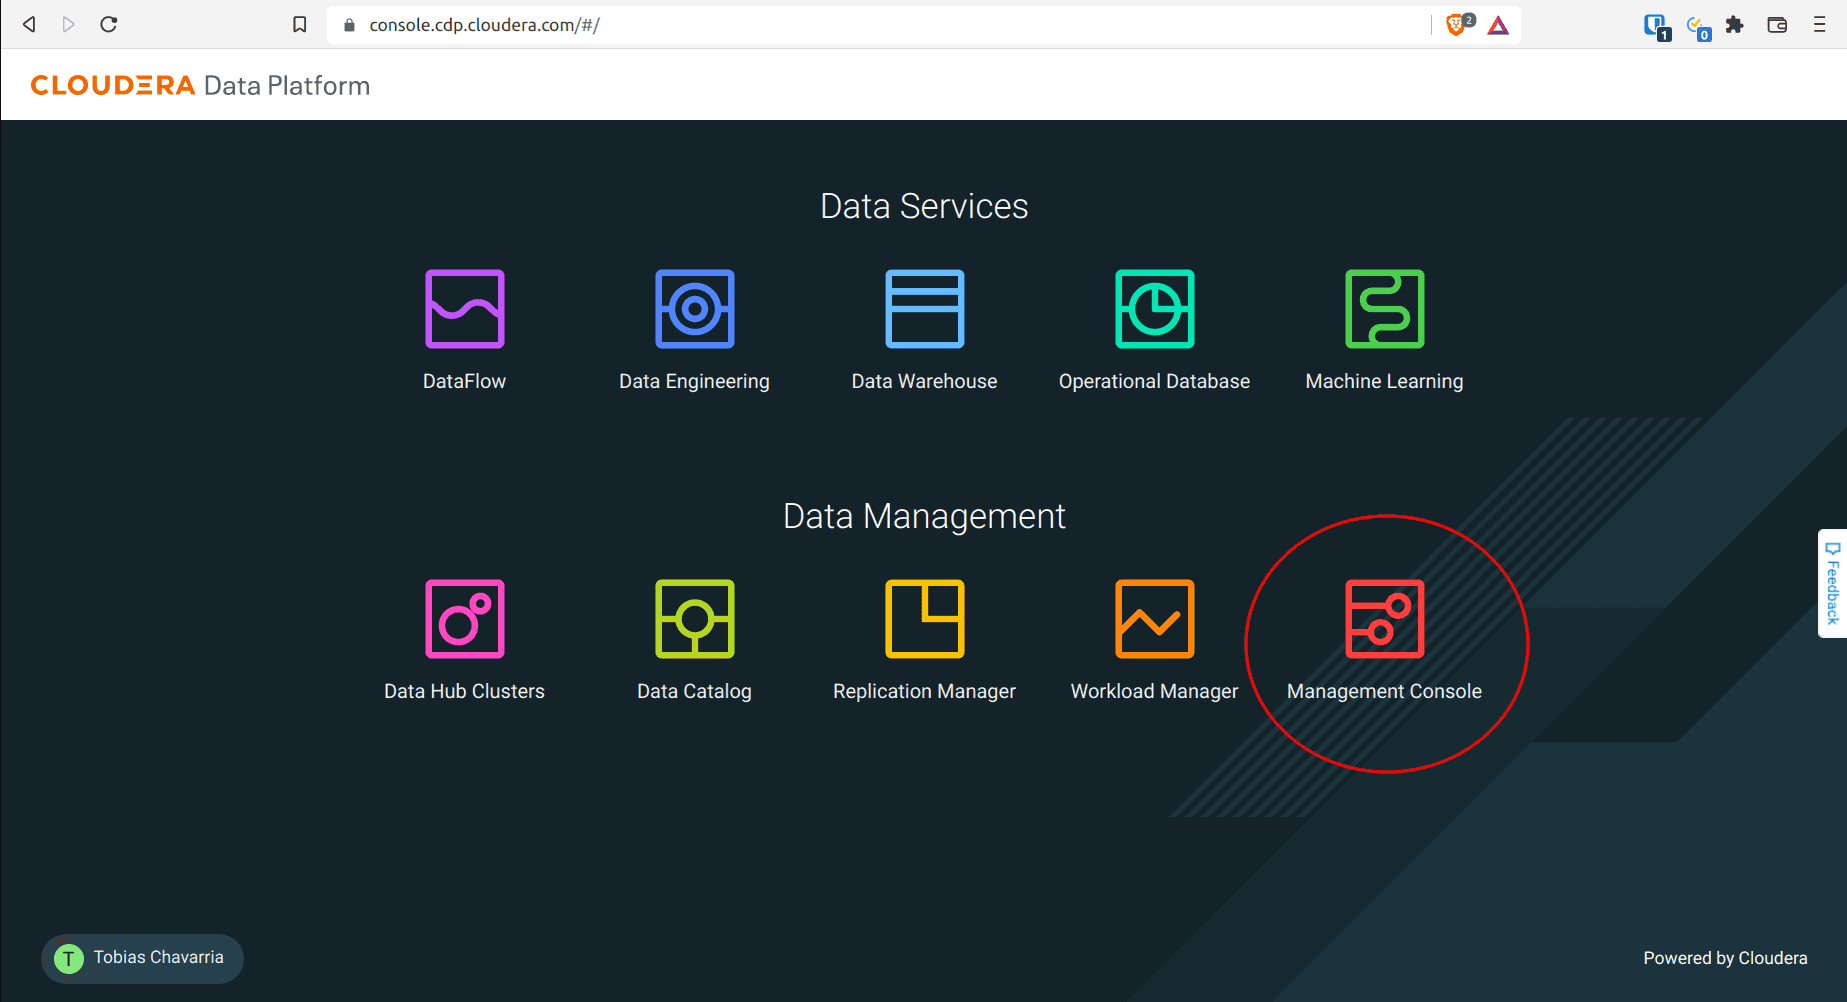
-
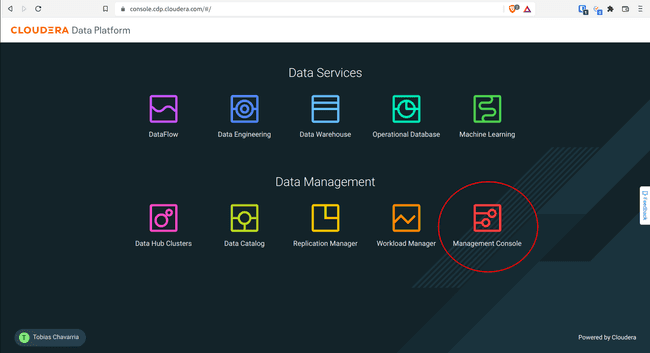
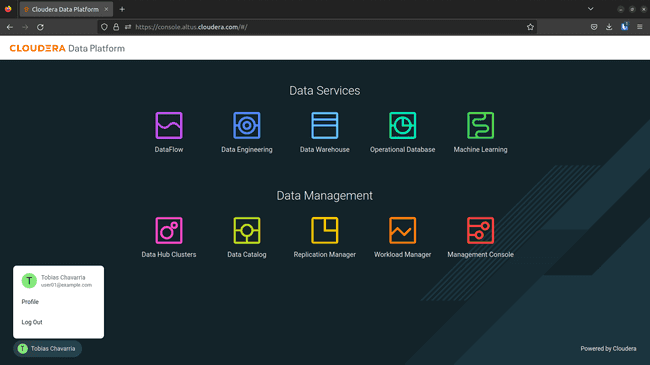
Access your CDP Console and select Management Console:
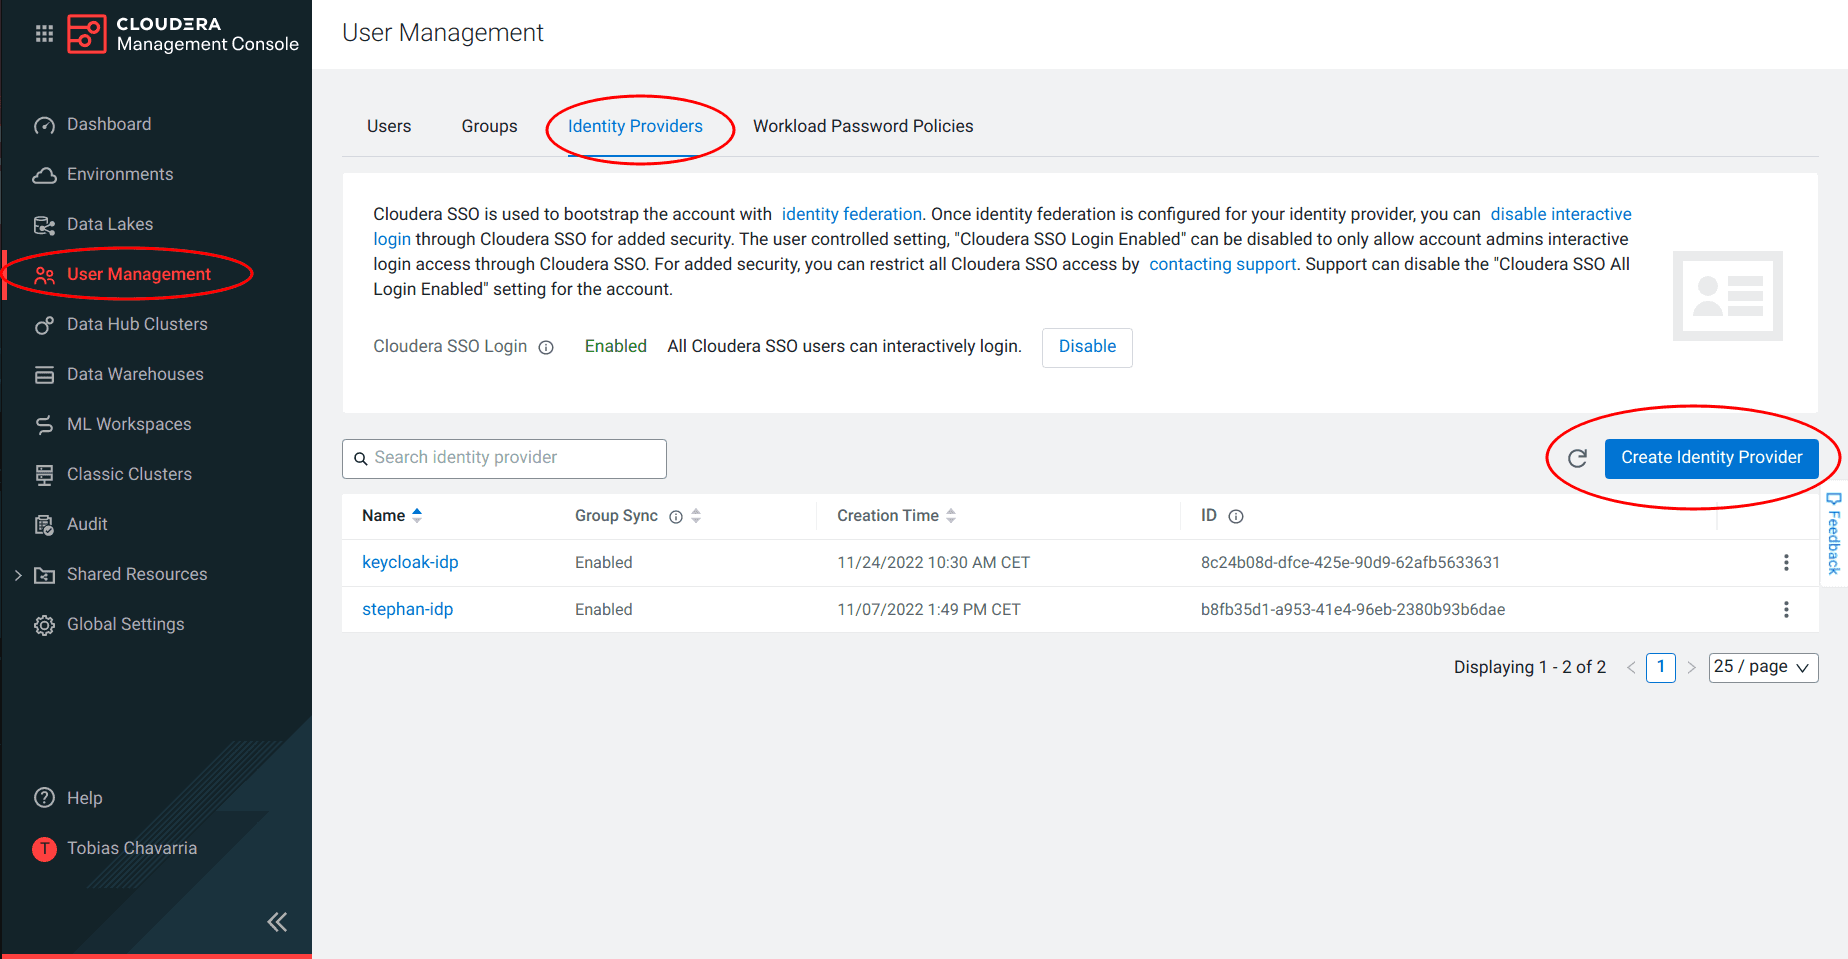
-
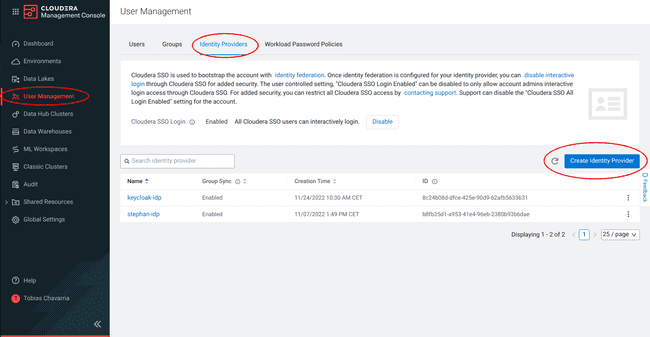
Navigate to User Management > Identity Providers > Create Identity Provider:
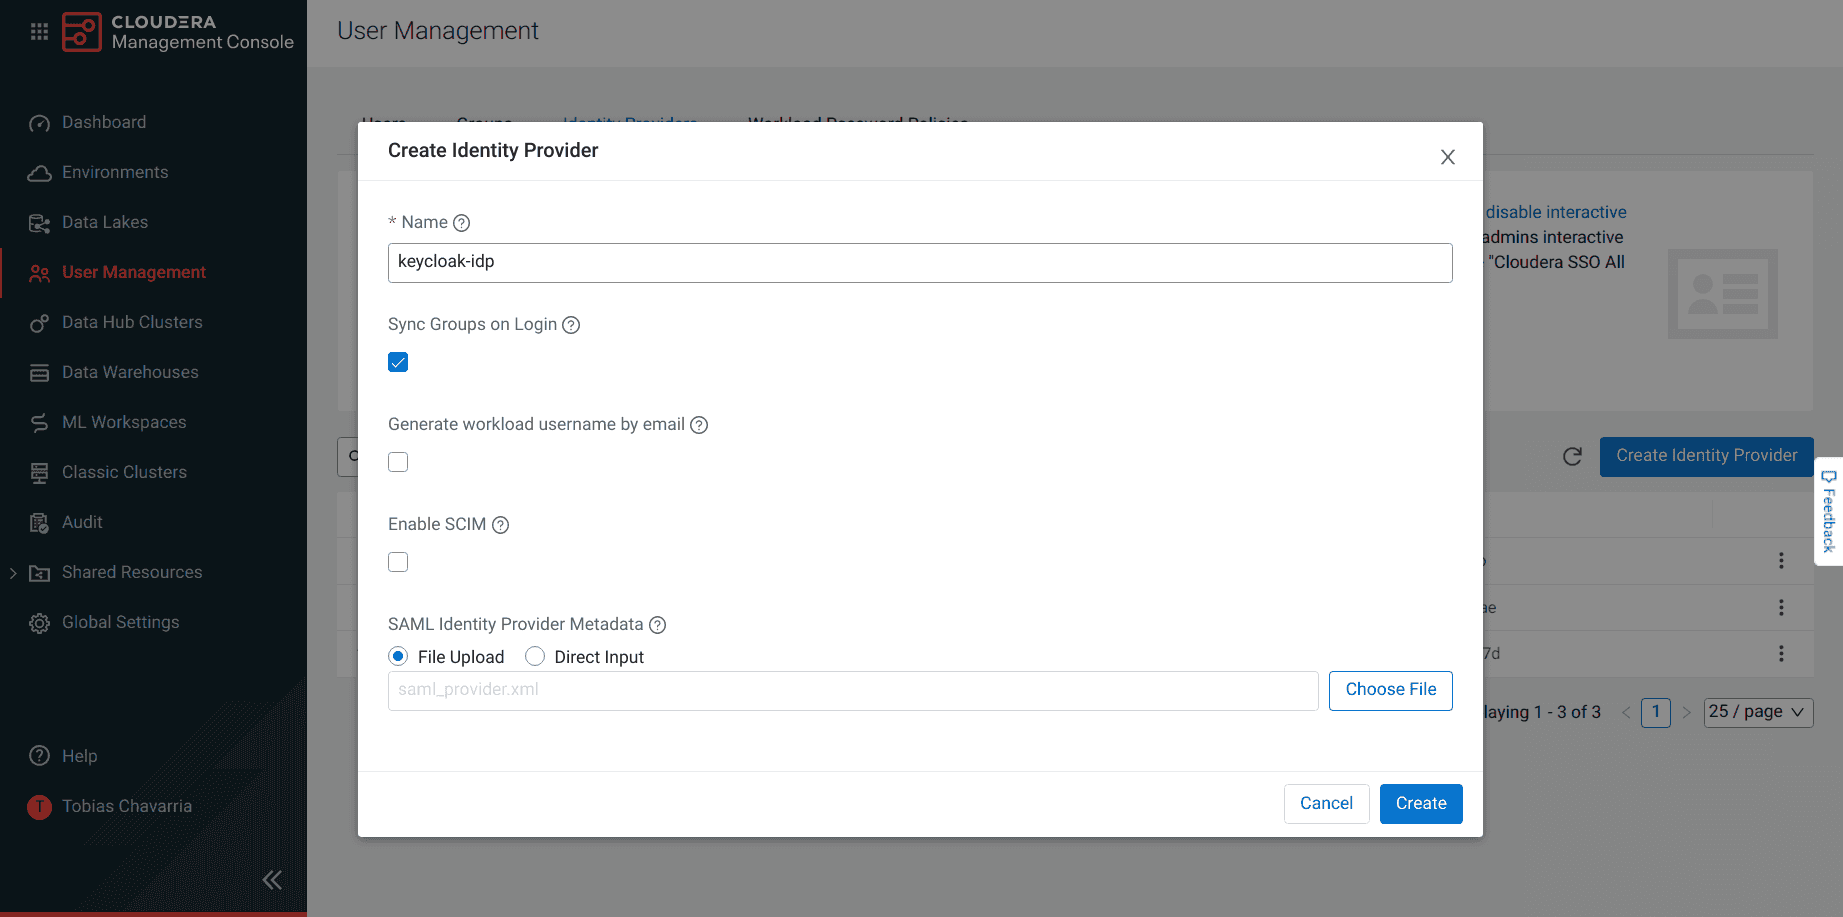
-
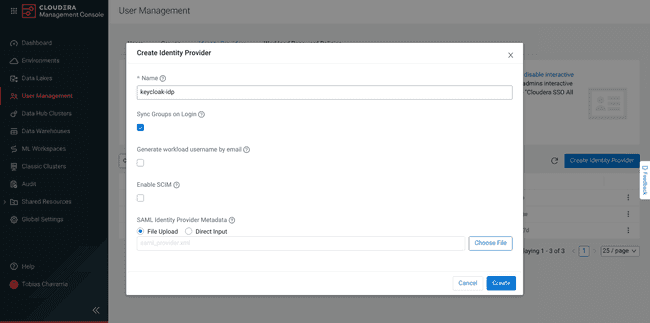
Create Identity Provider:
- Enter the name you want to use for the CDP identity provider.
- Check the Sync Groups on Login option: This synchronize the user group membership in CDP with the user group membership in Keycloak.
- In Provider Metadata, select File Upload and upload the
saml_provider.xmldownloaded in the previous step. - Click Create.
-
Copy the
<ID>generated after the creation process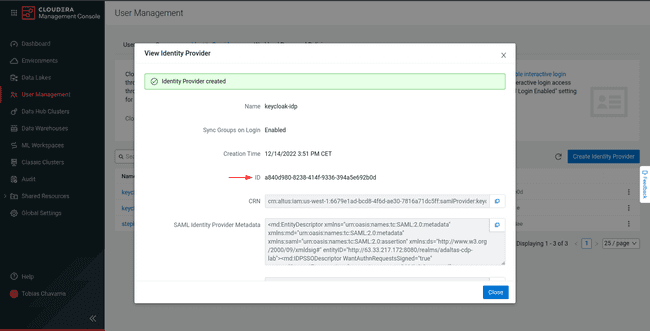
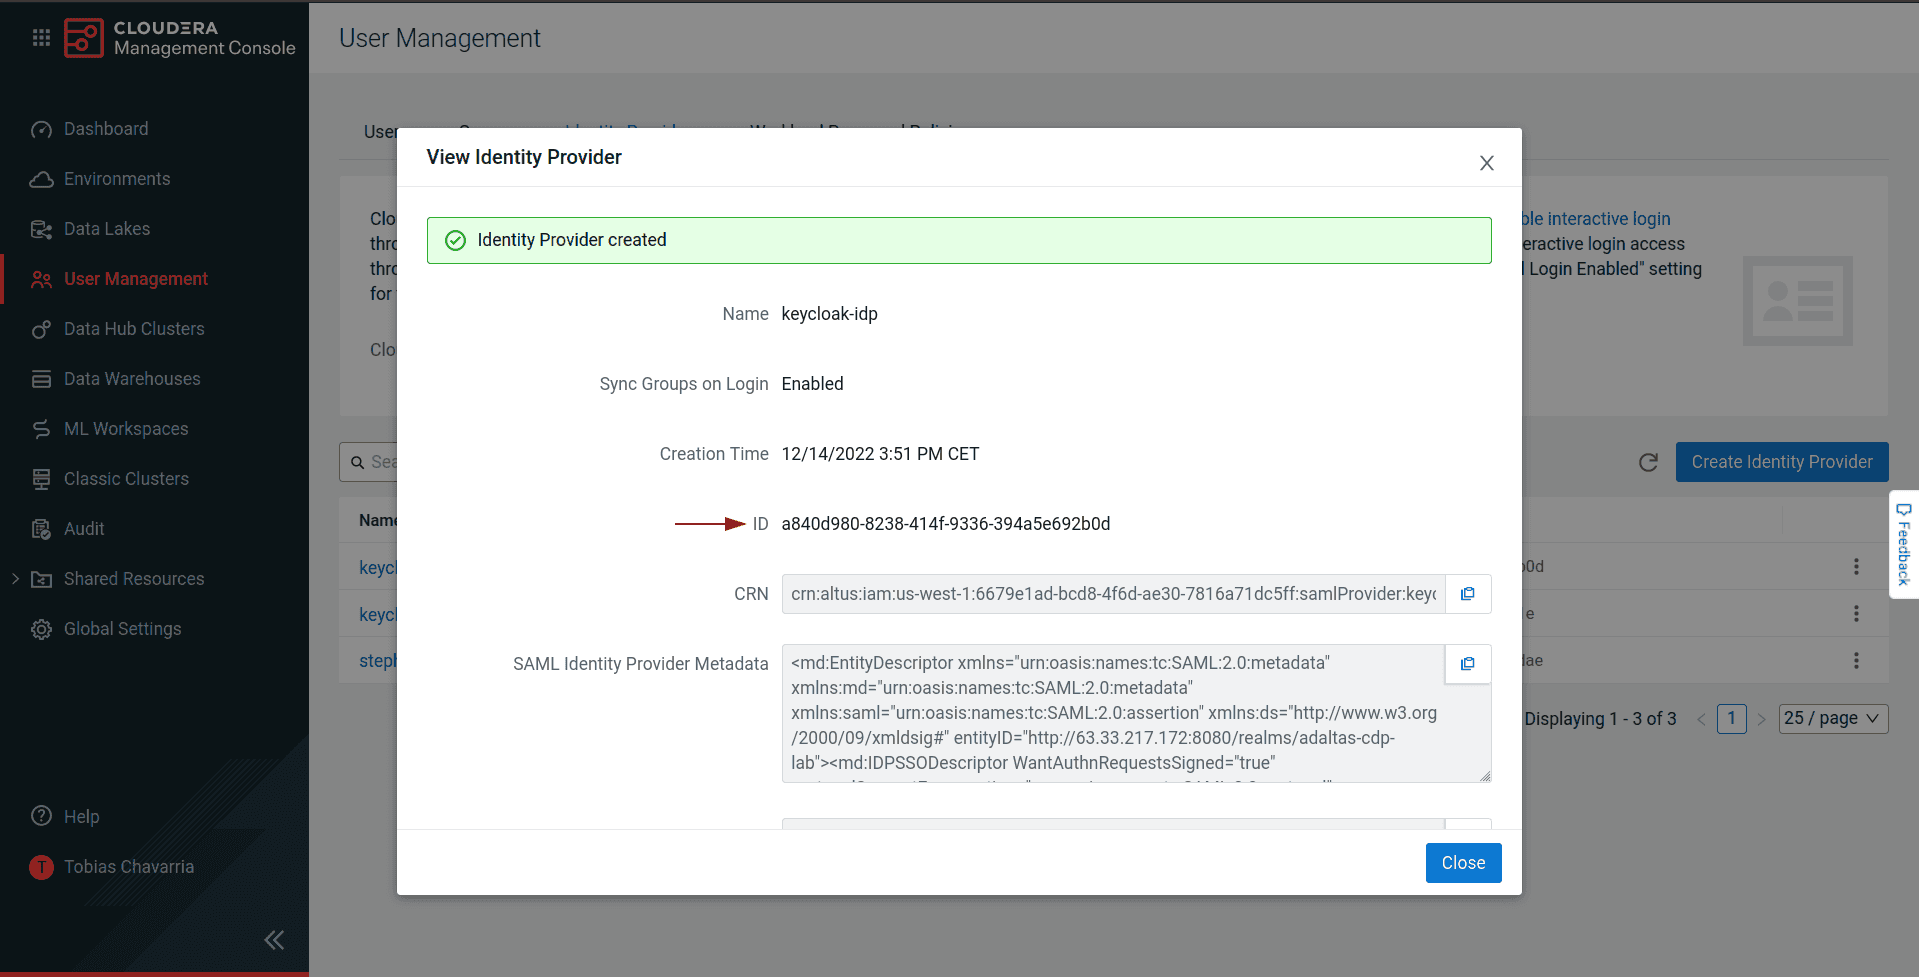
This <ID> is added to our Keycloak configuration in the next step.
Create the CDP Client on Keycloak
In this step, the CDP Control Plane client is created in our Keycloak deployment.
There are two ways to create a client in Keycloak:
- Using entity descriptor: import the client using a standard SAML Entity Descriptor json file.
- Manually through the Keycloak UI using the CDP SAML Service Provider Metadata available in the identity provider created in the previous step. (Check Managing OpenID Connect and SAML Clients for details.)
In this case, we use a SAML Entity Descriptor file: cdp-client.
Remark: The cdp-client was found in this article: How to configure Single Sign-On (SSO) for CDP Public Cloud the open-source way with Keycloak.
The author clarifies that this file, is neither official nor provided by Cloudera but includes the required settings, SAML assertion, and signing certificates required by CDP.
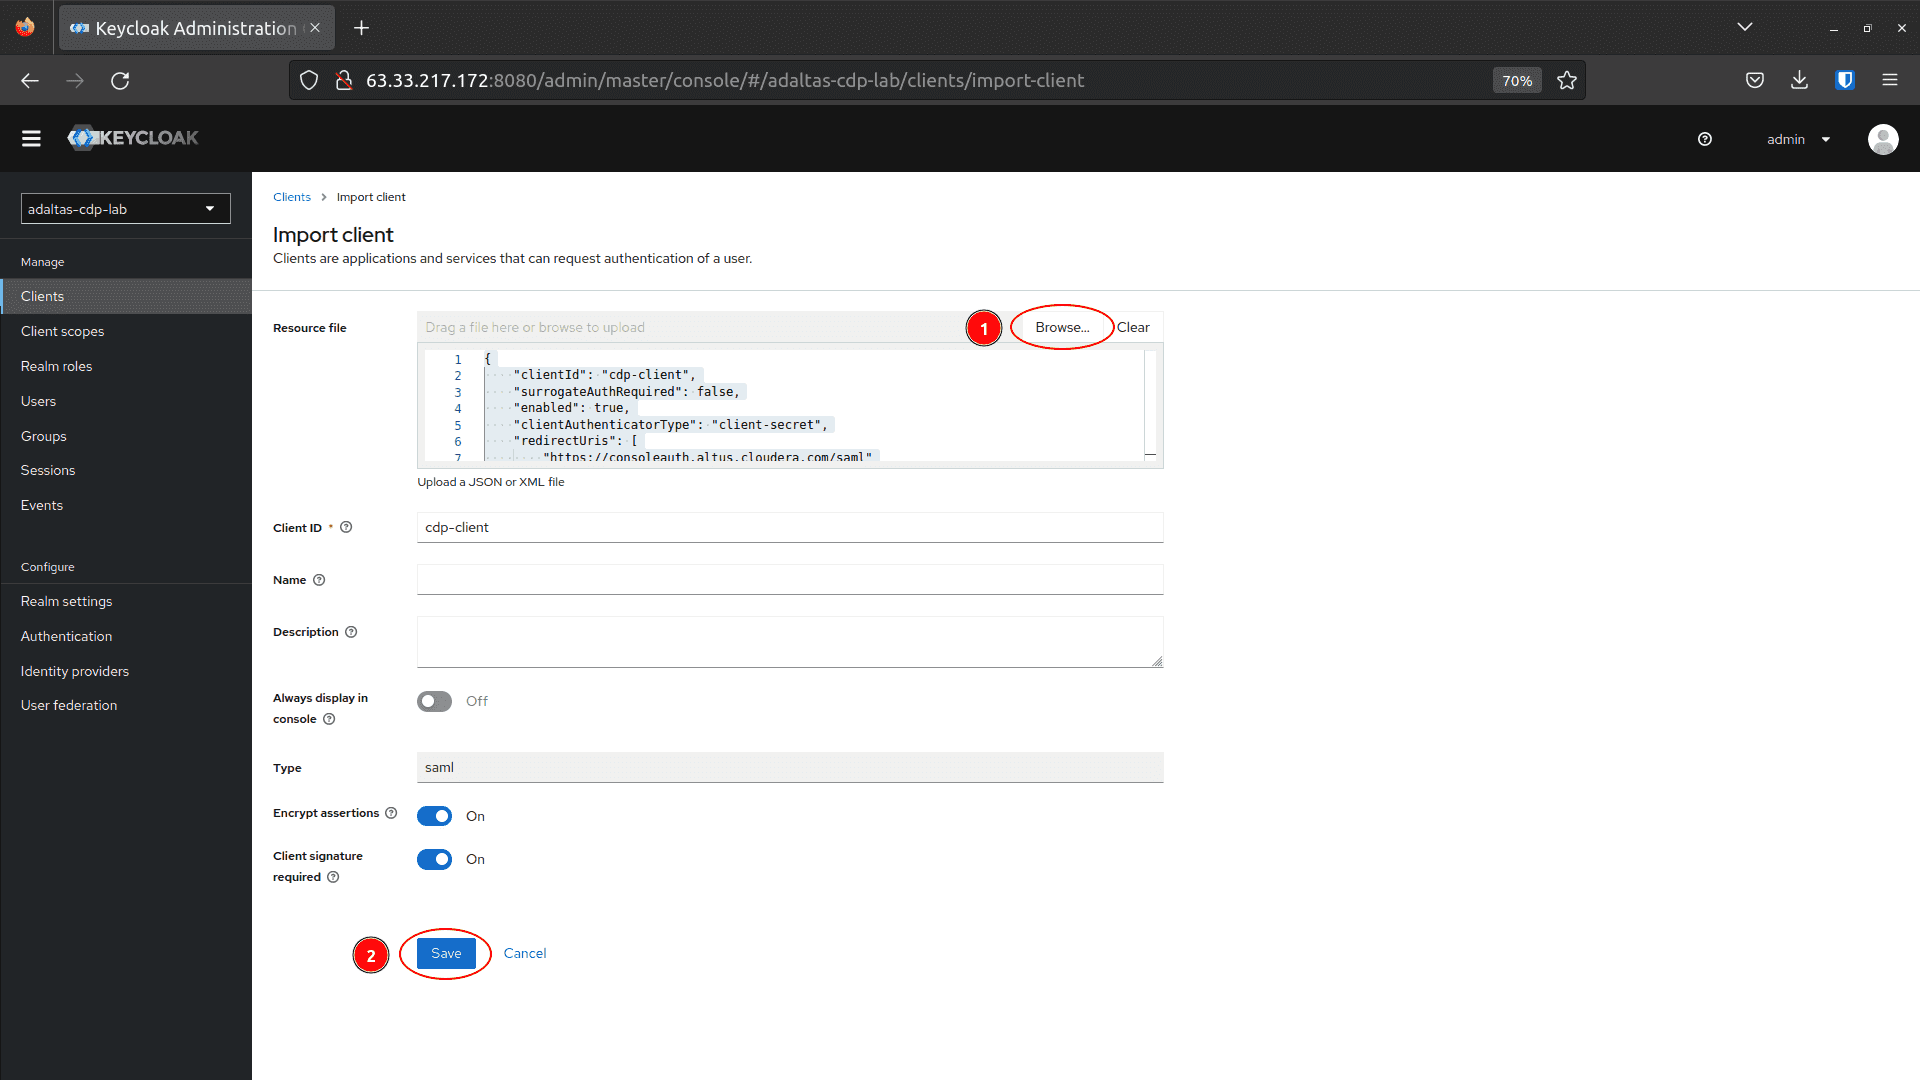
To create a SAML 2.0 client in Keycloak by importing a configuration file follow these steps:
-
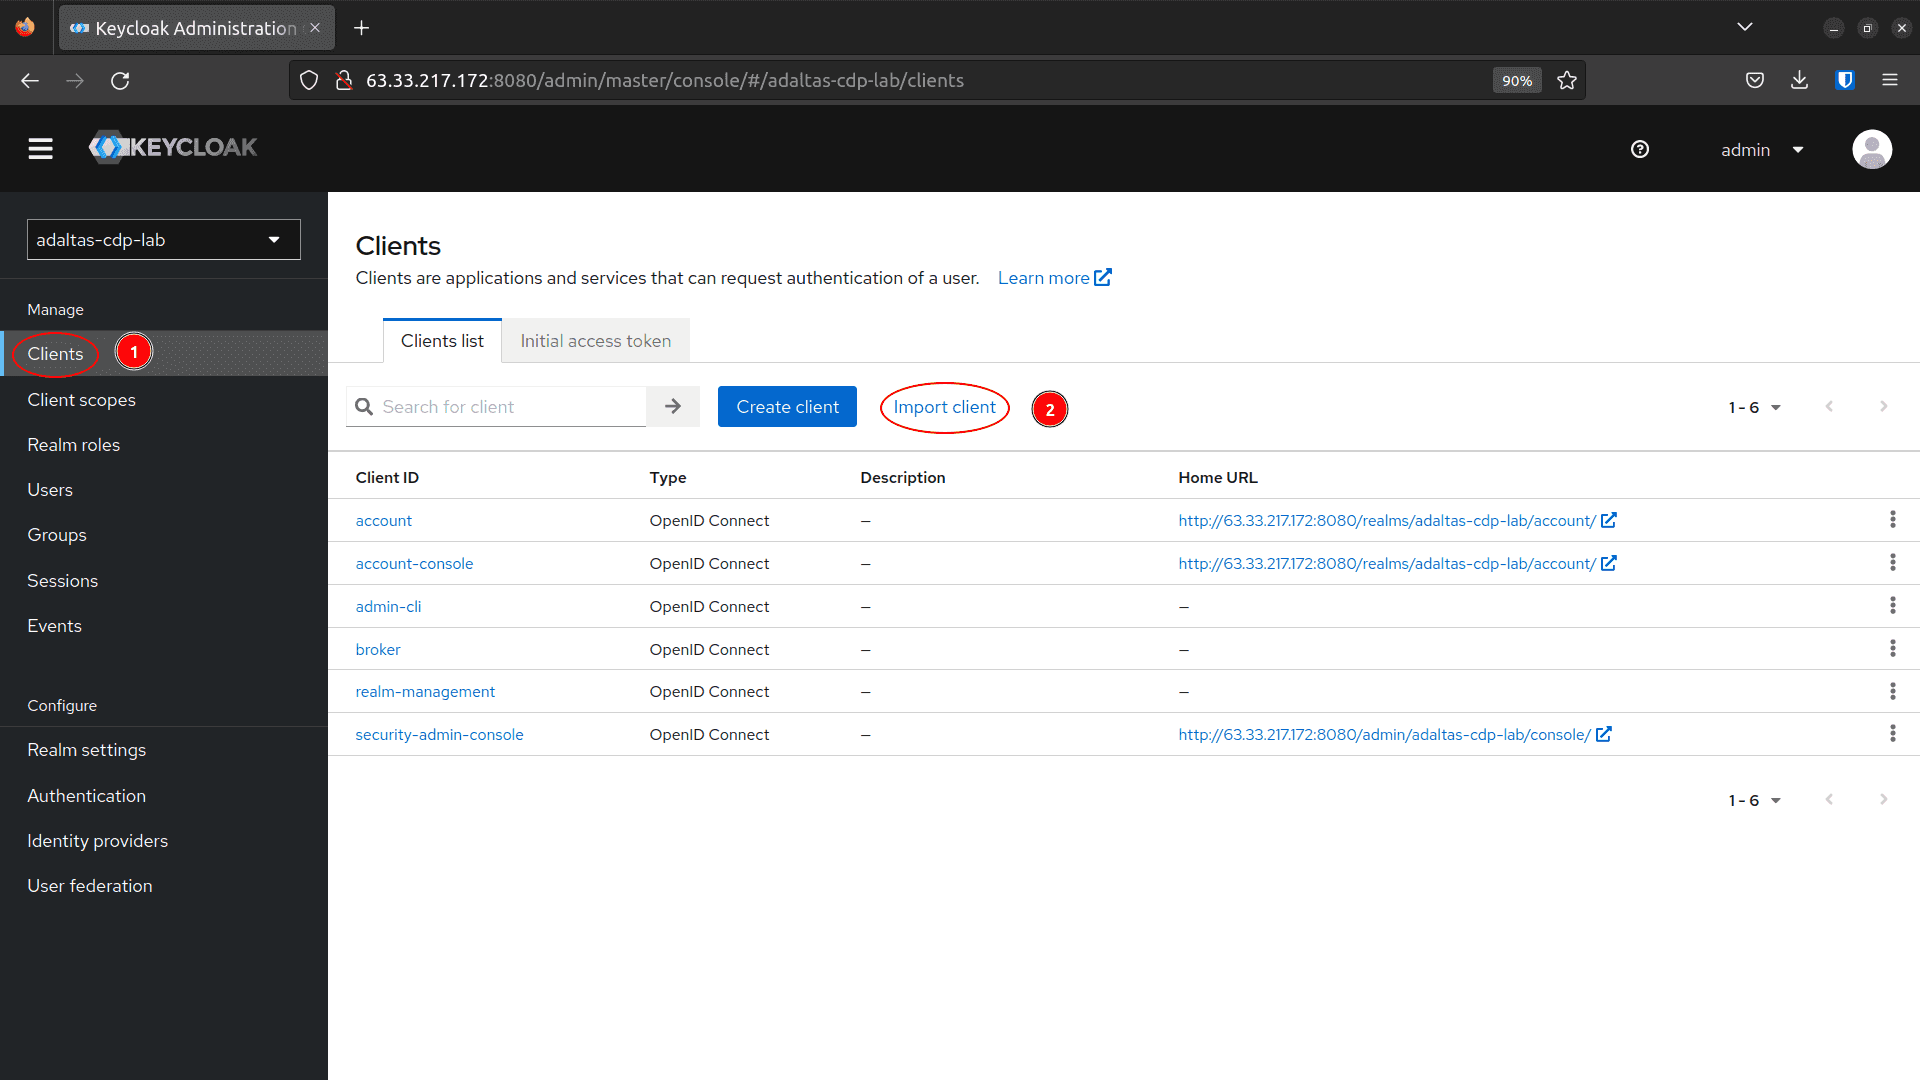
In the Keycloak Admin Console navigate to Clients and click Create
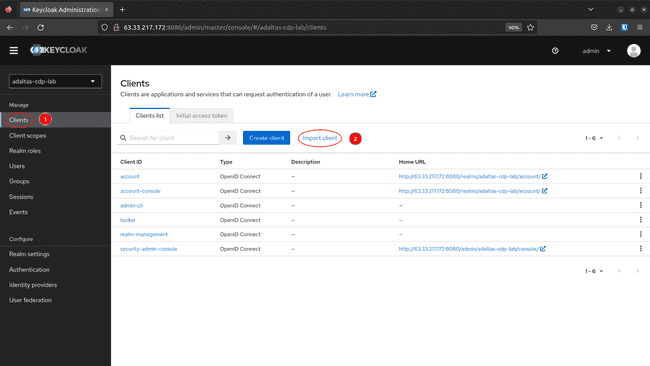
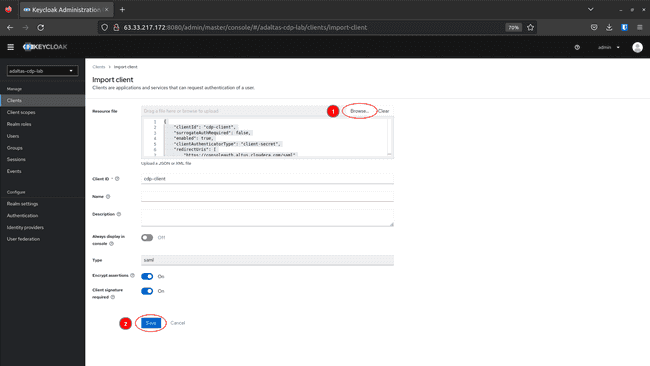
-
Click Browse and load the cdp-client file. This automatically updates the Client ID and Type parameters. Click Save
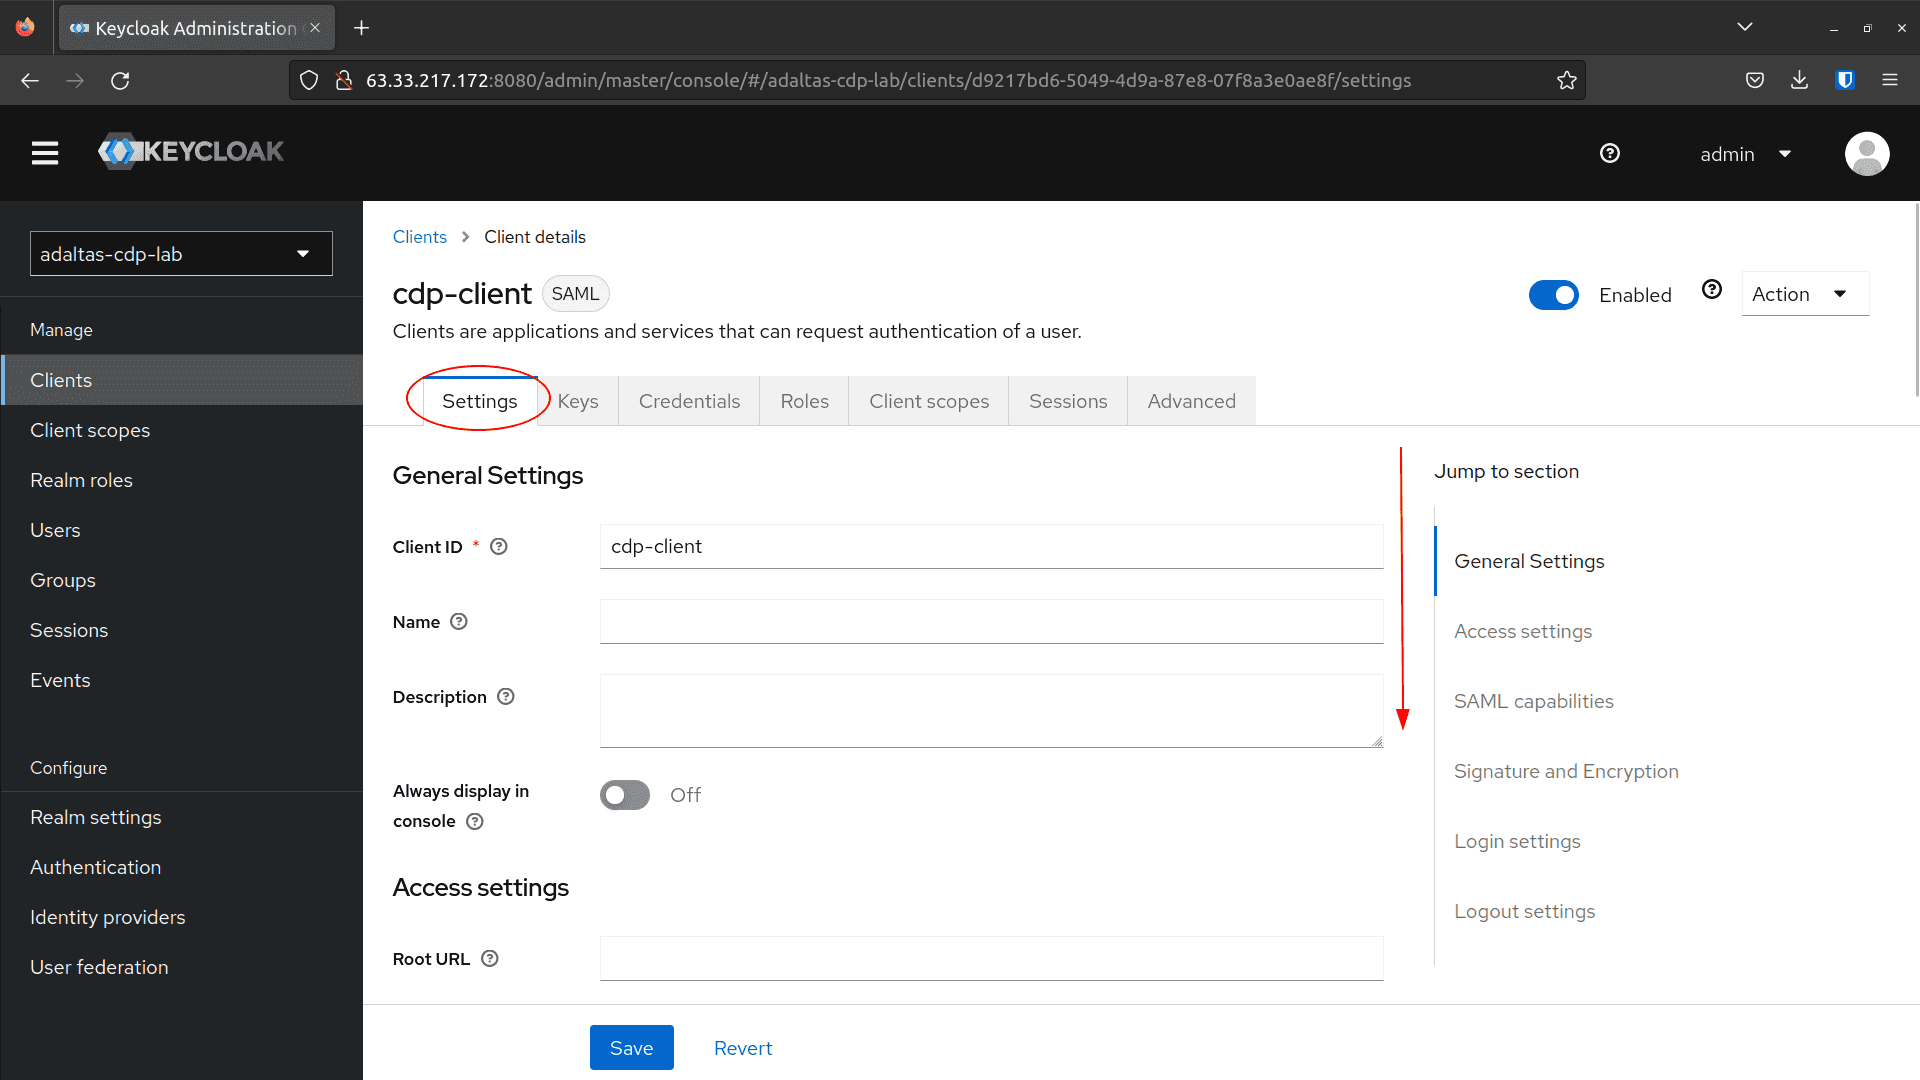
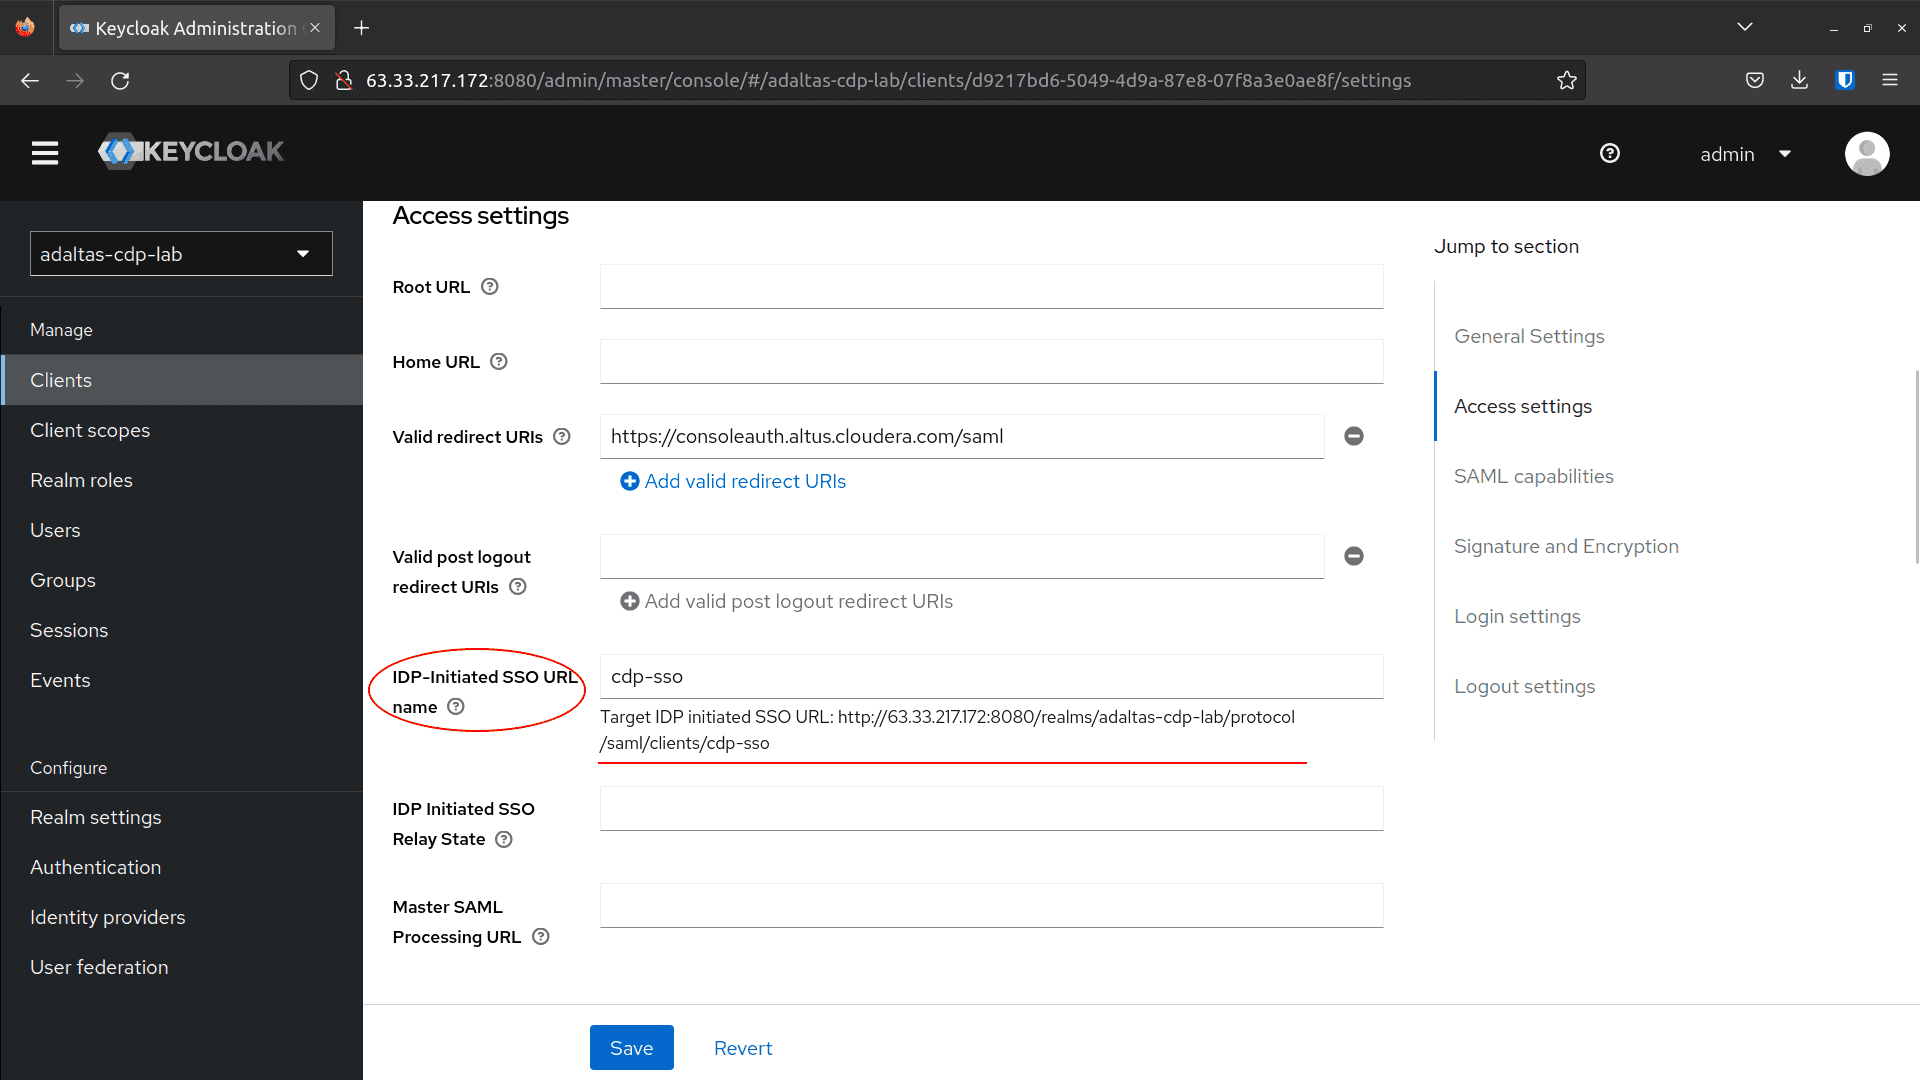
-
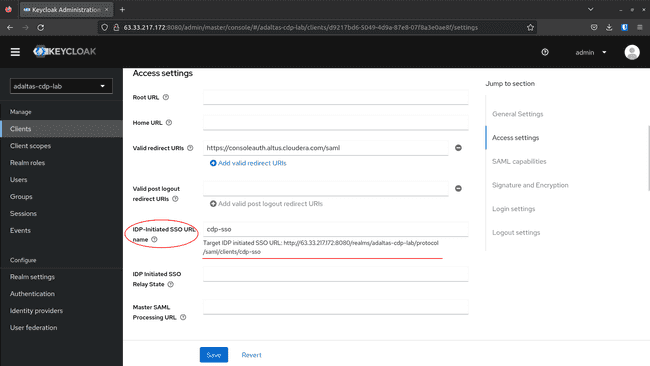
To get the Login Page URL, navigate to the Settings tab and scroll down until the IDP Initiated SSO URL Name variable.
It might look like this:
http://<ec2_public_ip>:8080/realms/adaltas-cdp-lab/protocol/saml/clients/cdp-sso.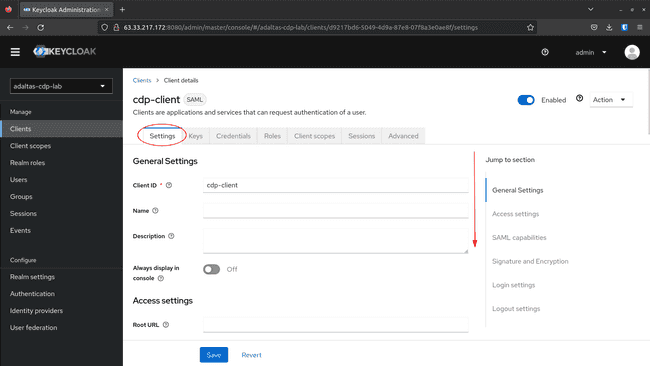
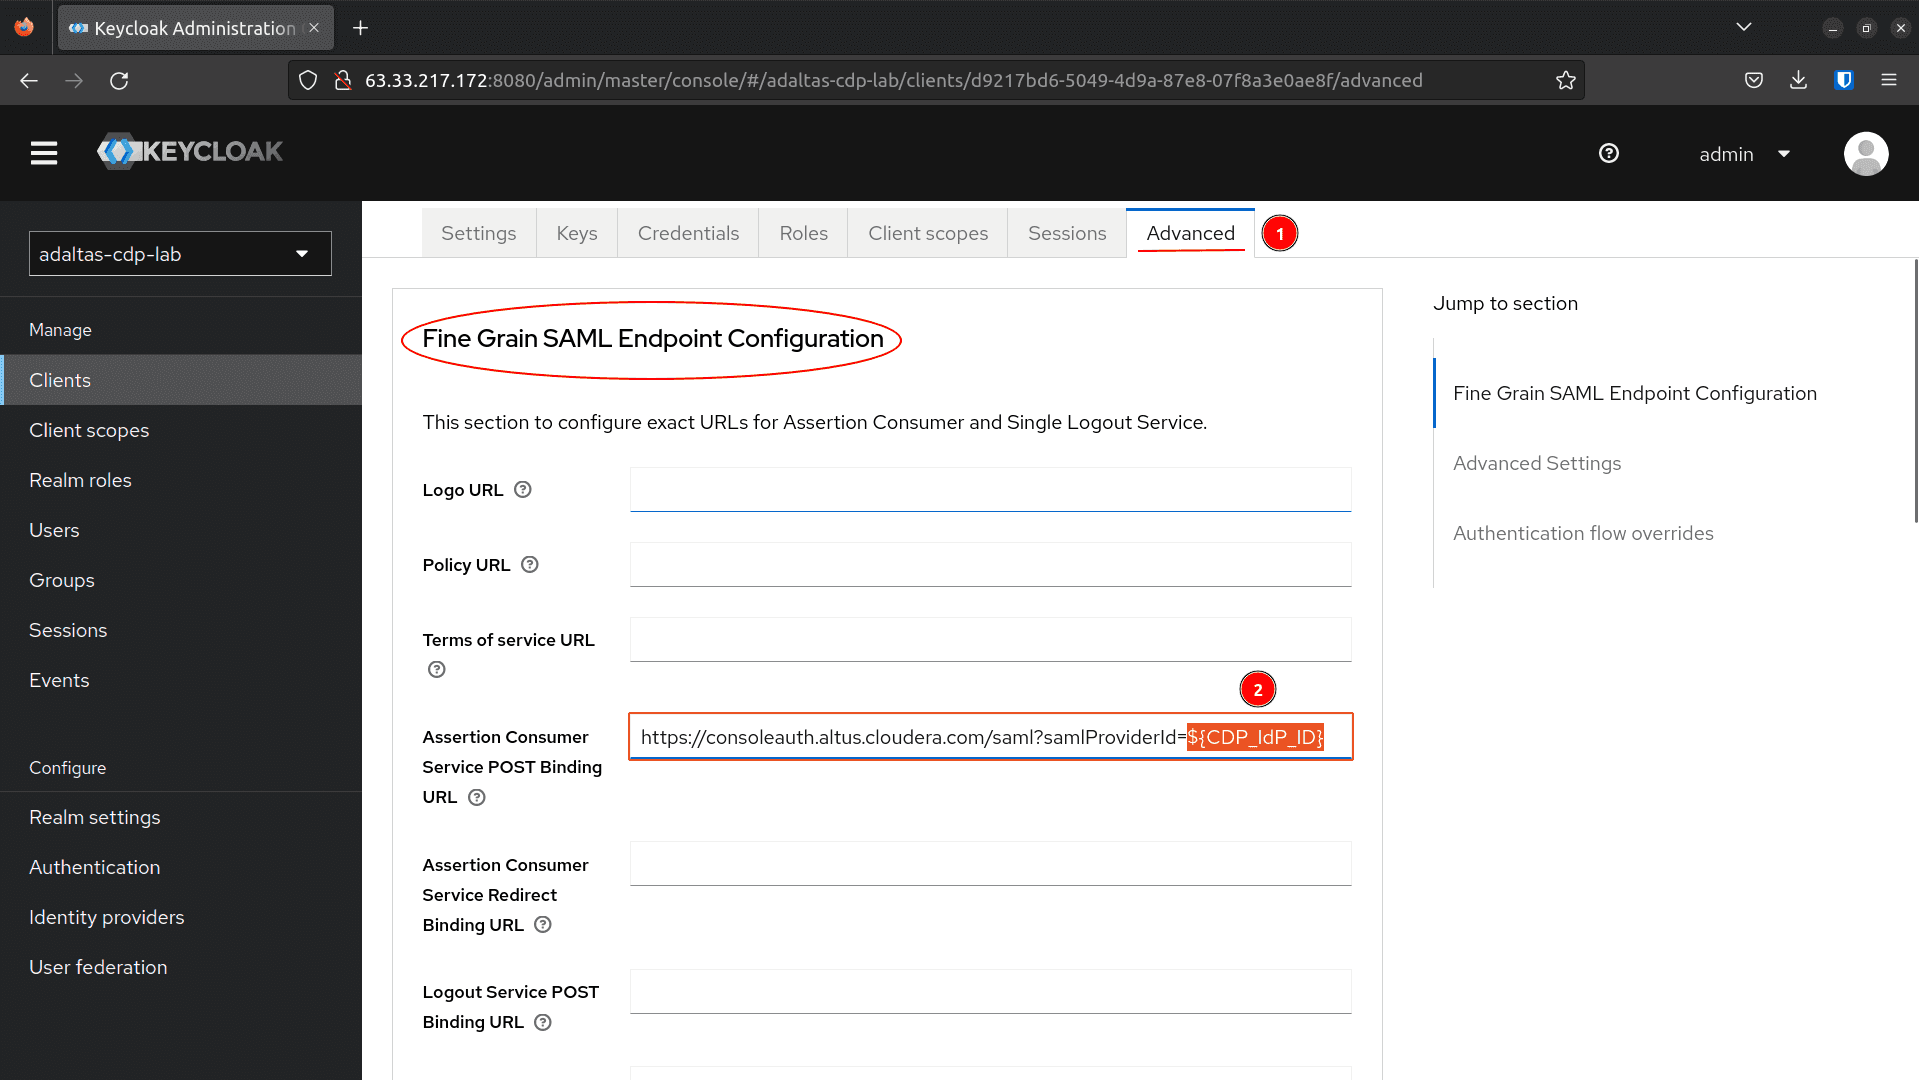
-
Navigate to Advanced tab, replace
${CDP_IdP_ID}with the Identity Provider ID generated by CDP in the previous step. Scroll down and click Save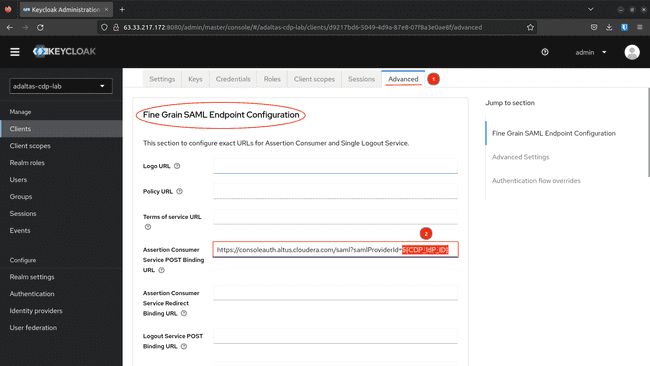
-
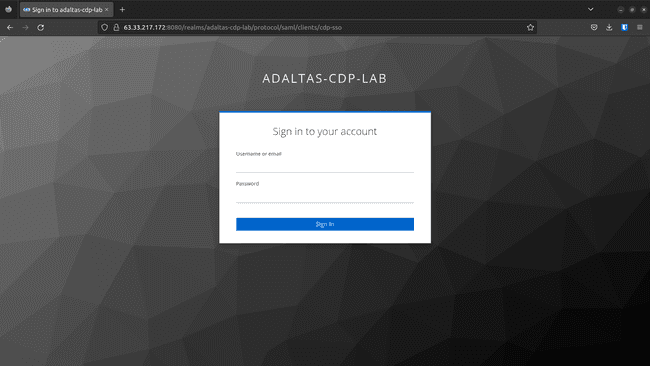
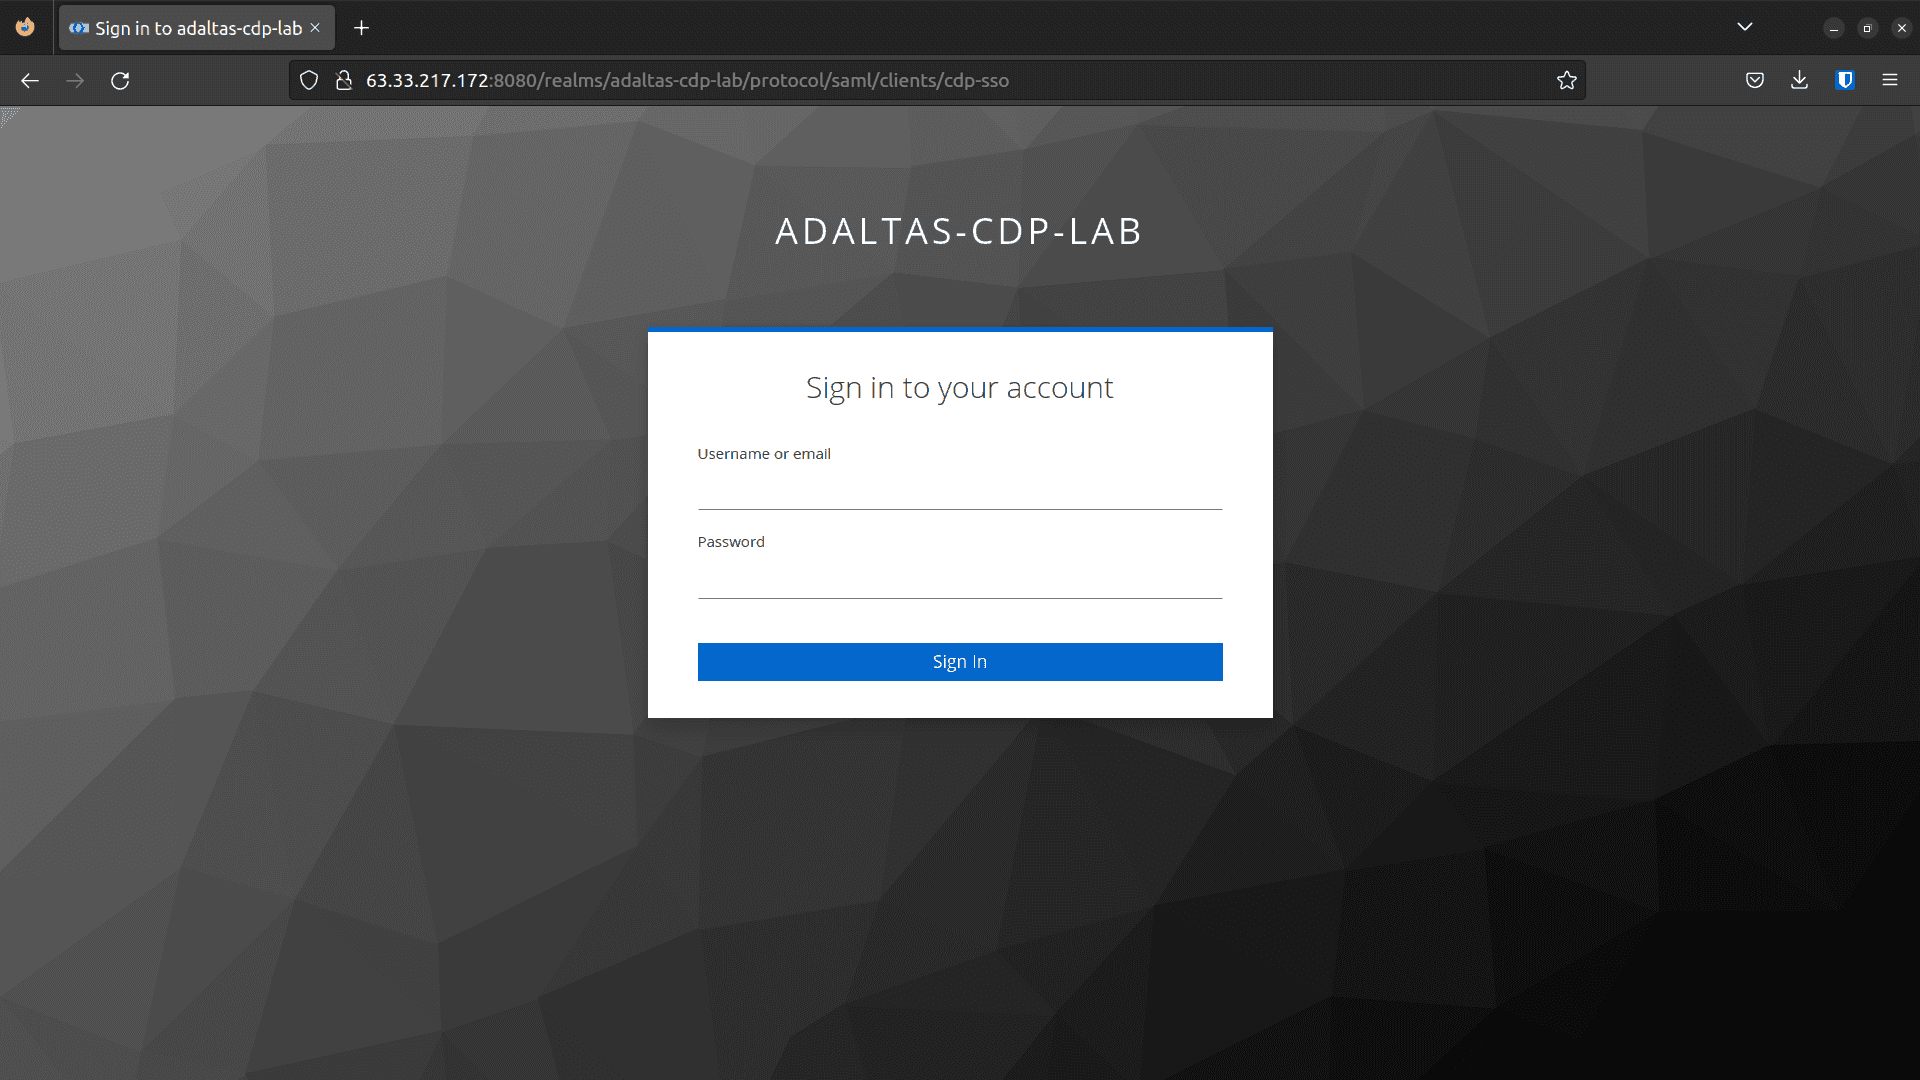
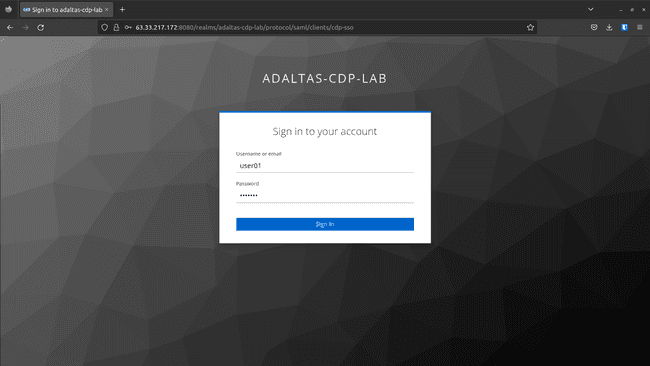
Test the Login Page URL:
Manage Group and Users
Now that the Realm and the client are ready, we create/manage users and groups via the Admin Console.
Create a group:
-
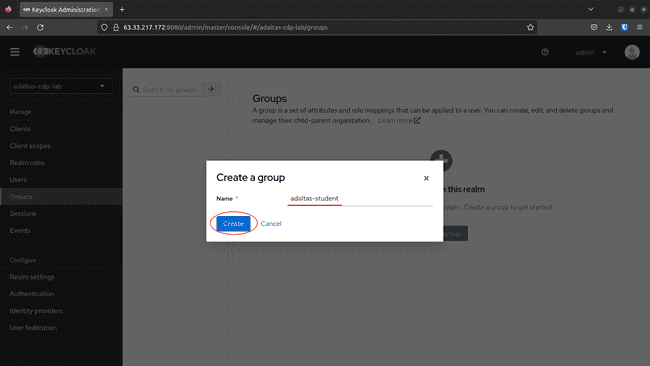
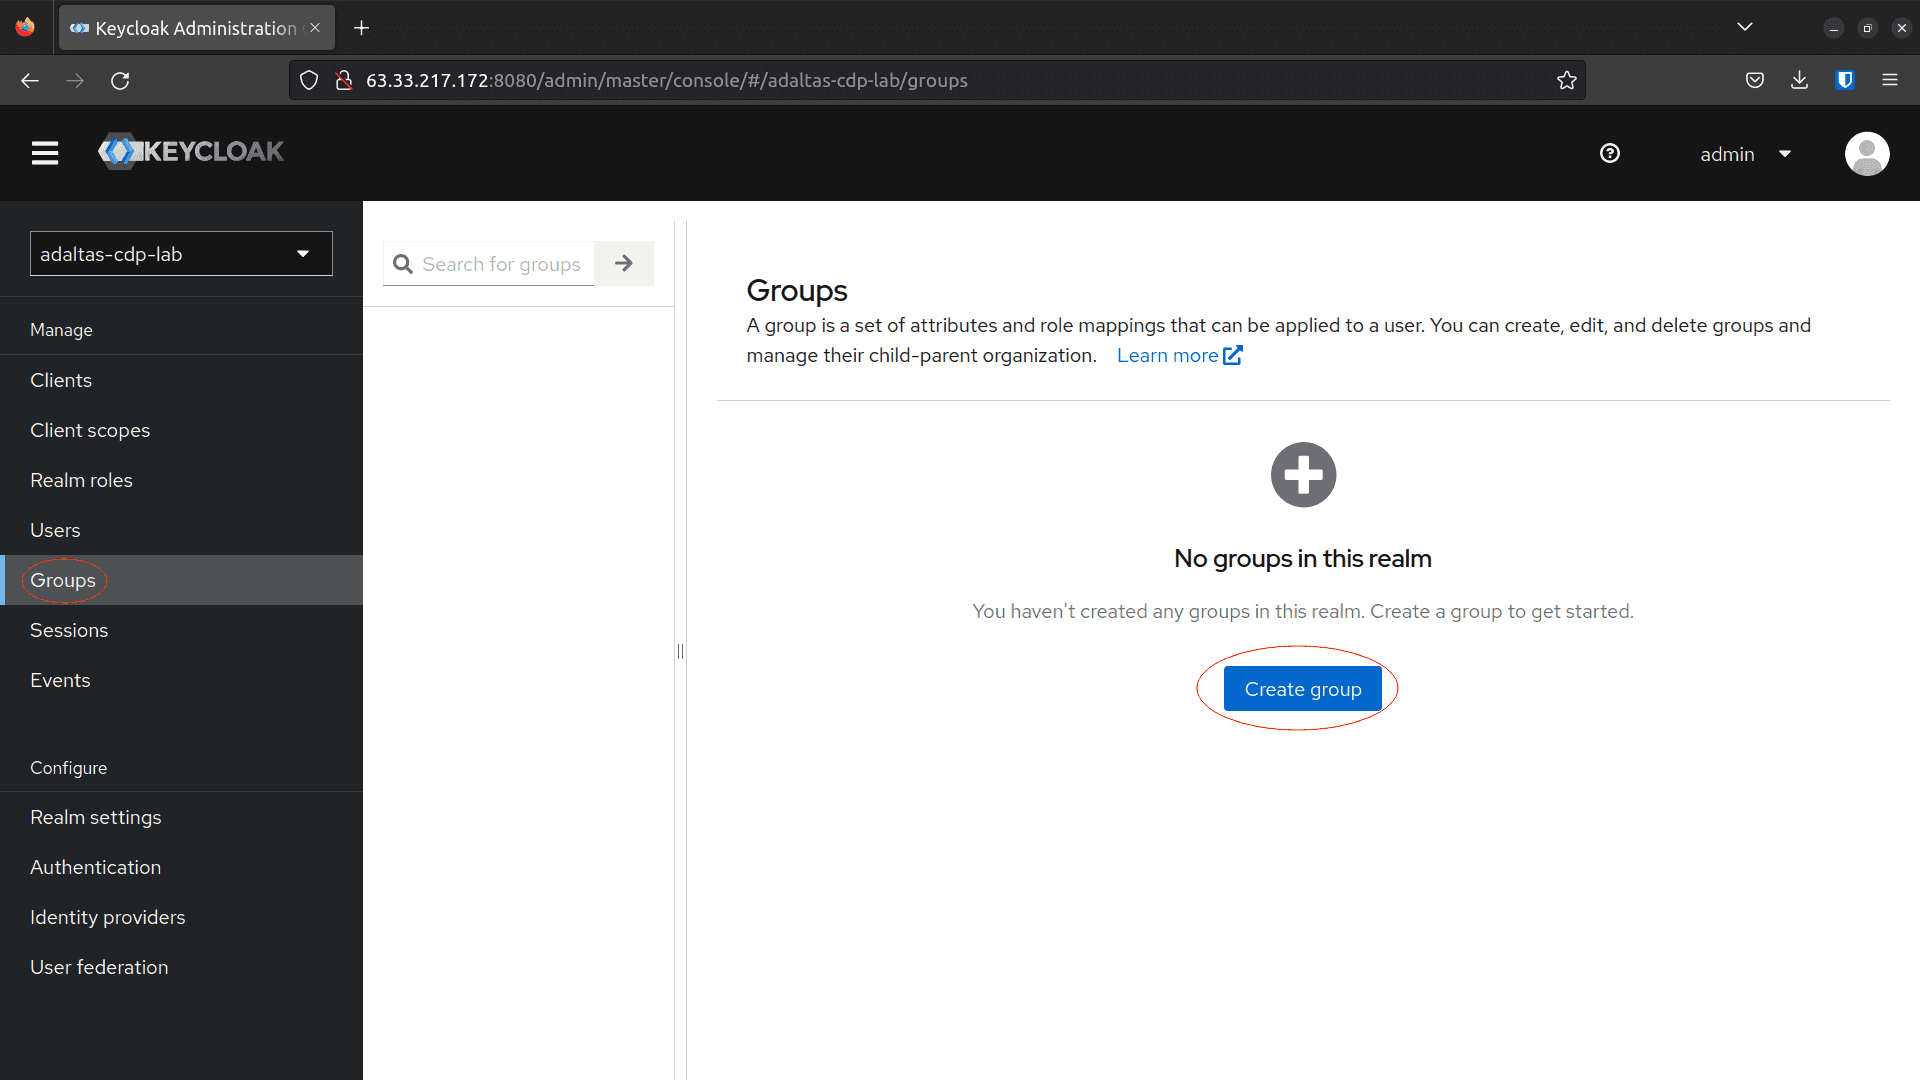
Navigate to Groups on the left menu, and click Create group:

-
Fill the name and click Save:
Note: Be careful while choosing the
GROUP_NAMEsince there is a list of group names that are reserved and therefore cannot be synchronized to CDP.

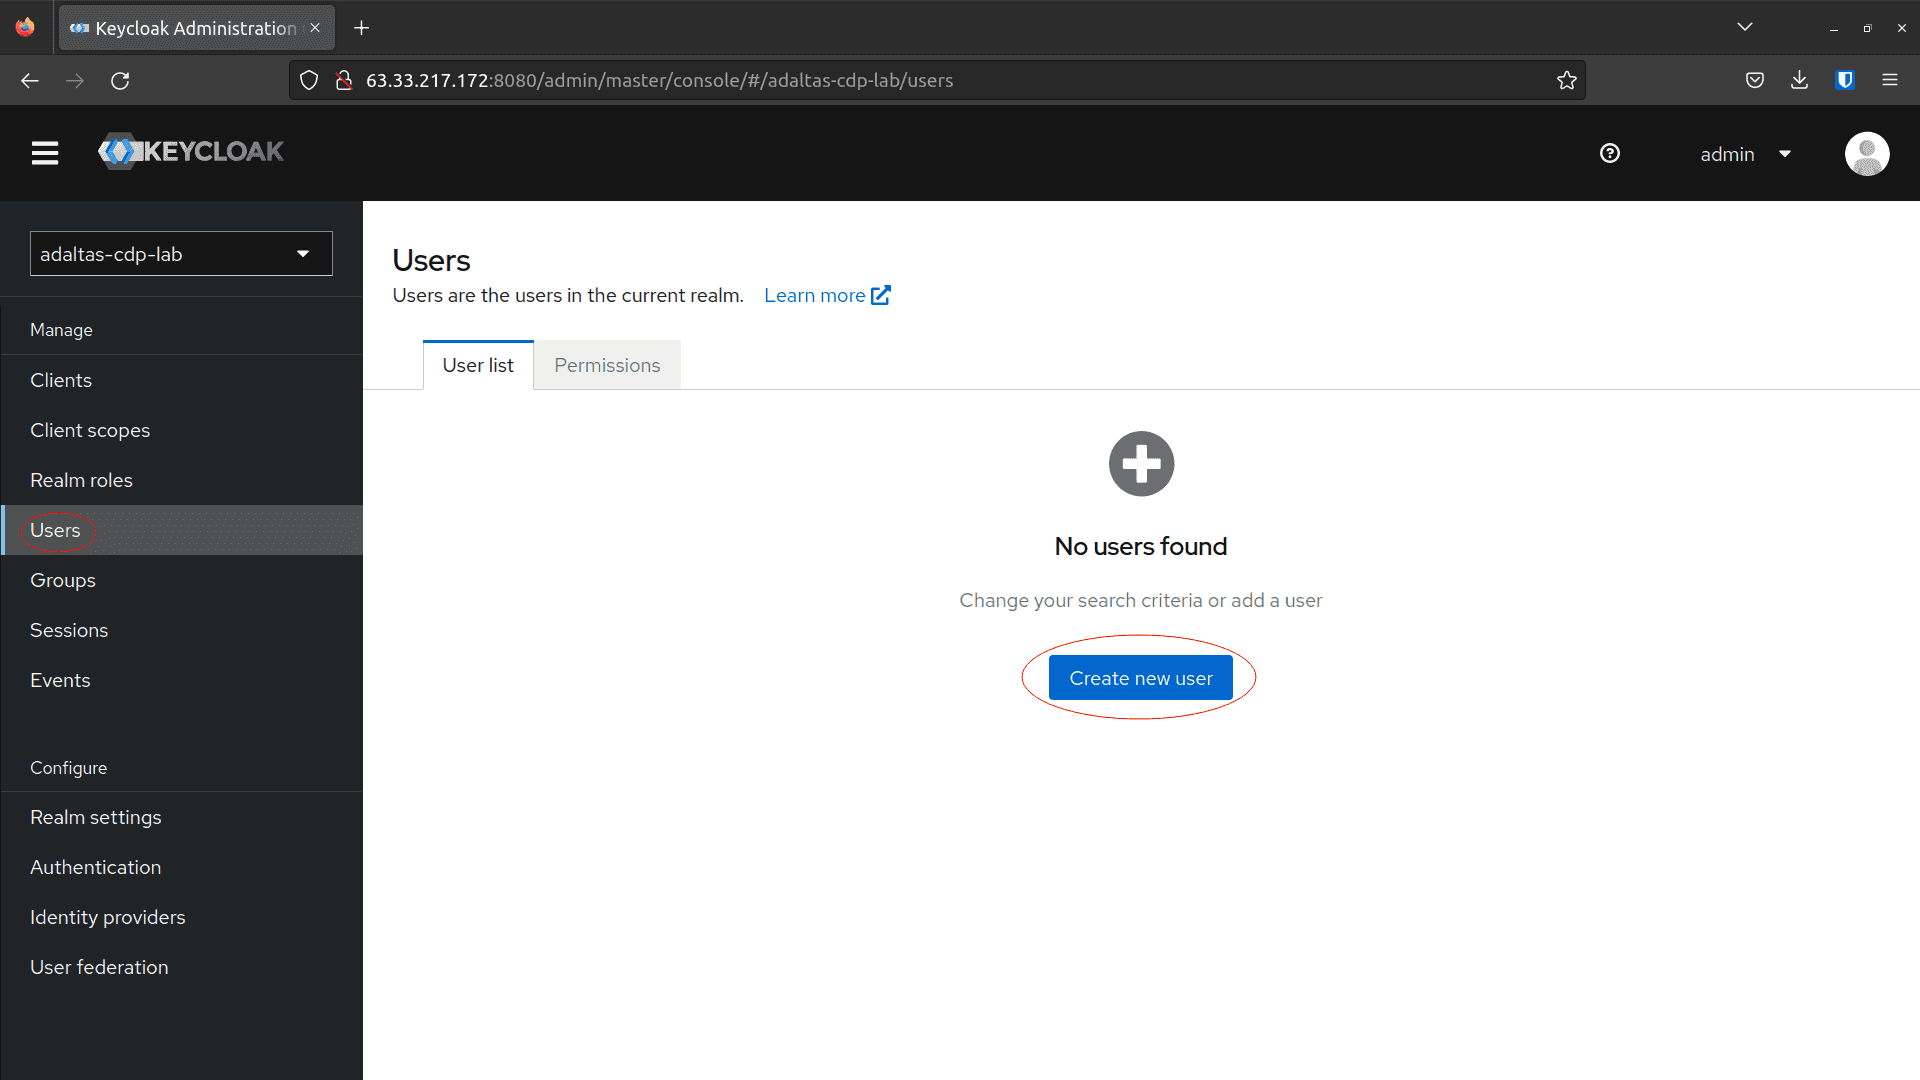
Create a user:
-
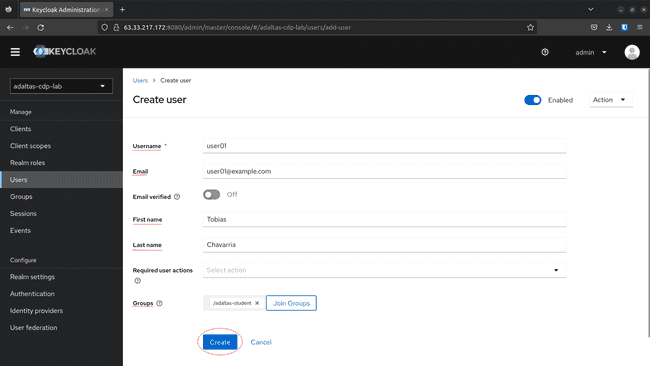
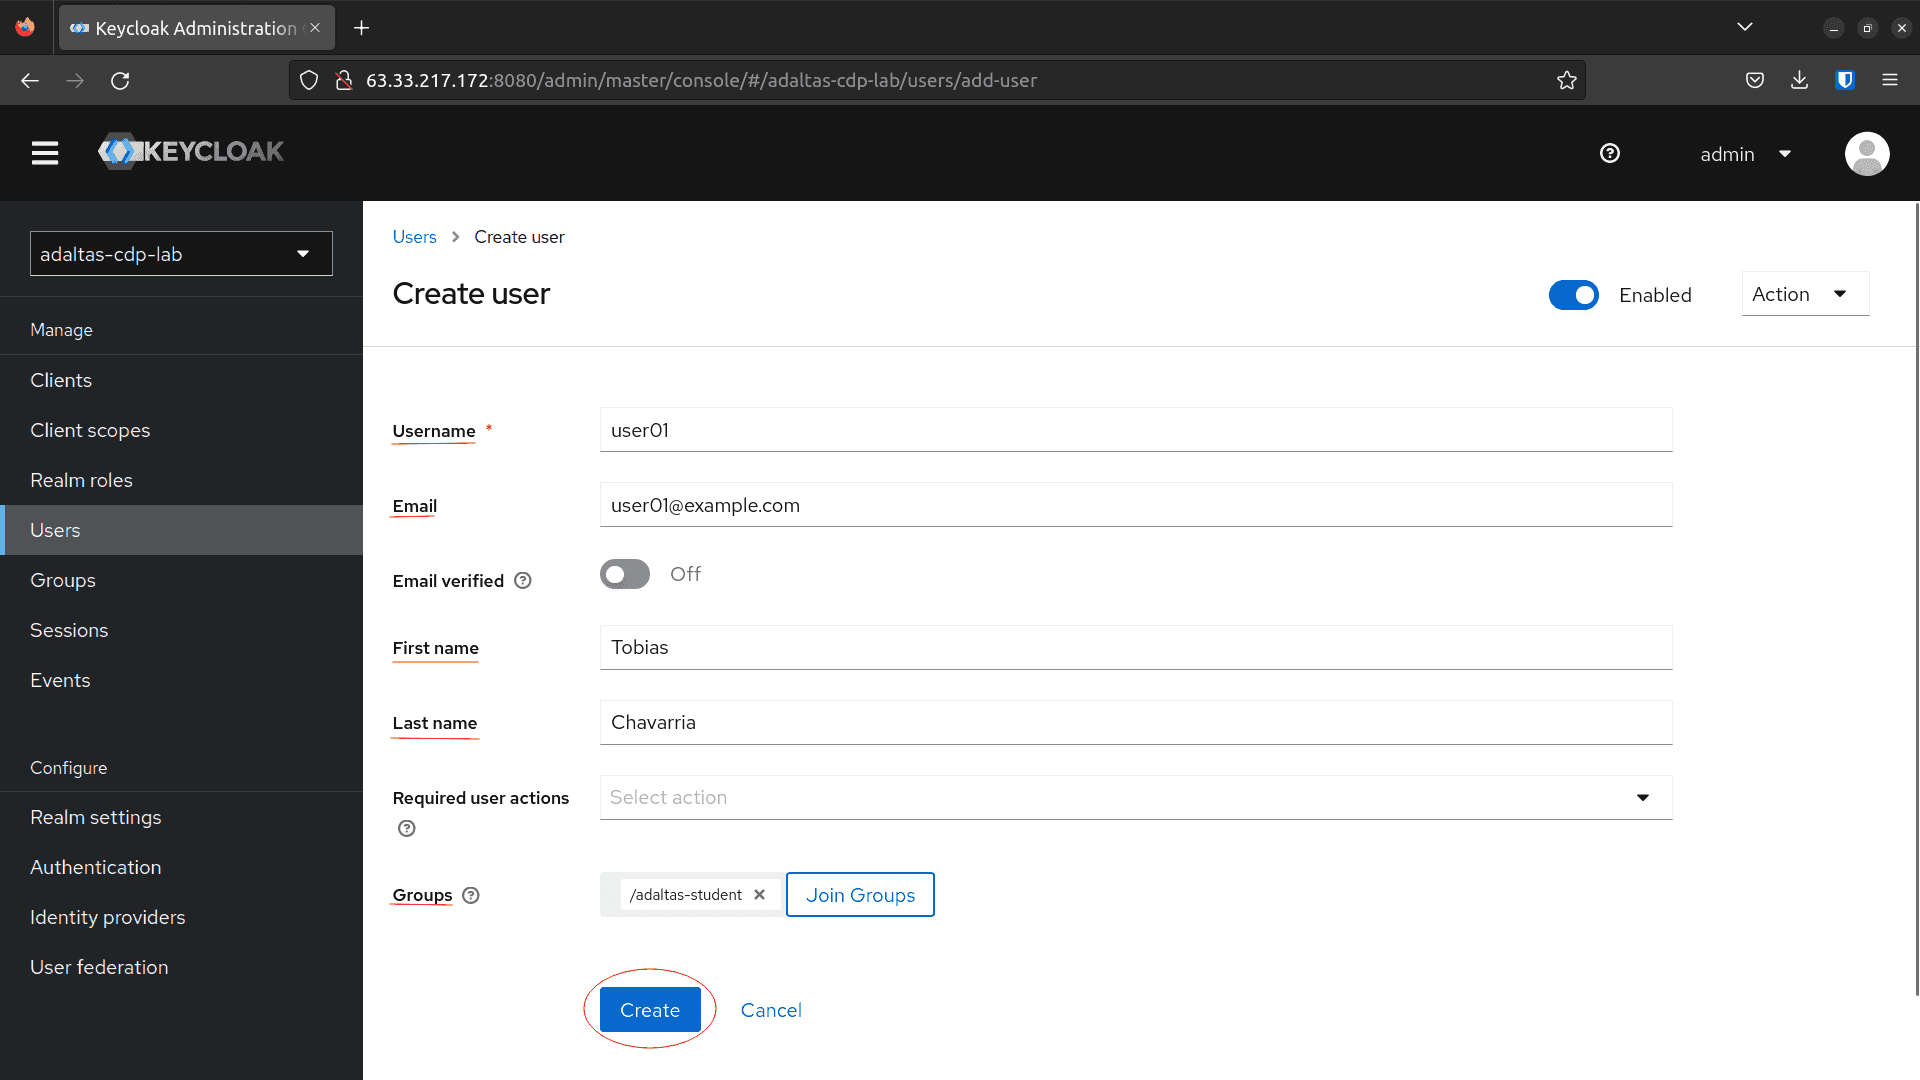
Navigate to Users on the left menu, and click Create new user:

-
Set the following parameters and click Create:
- Username
- First Name
- Last Name
- Select the group created above
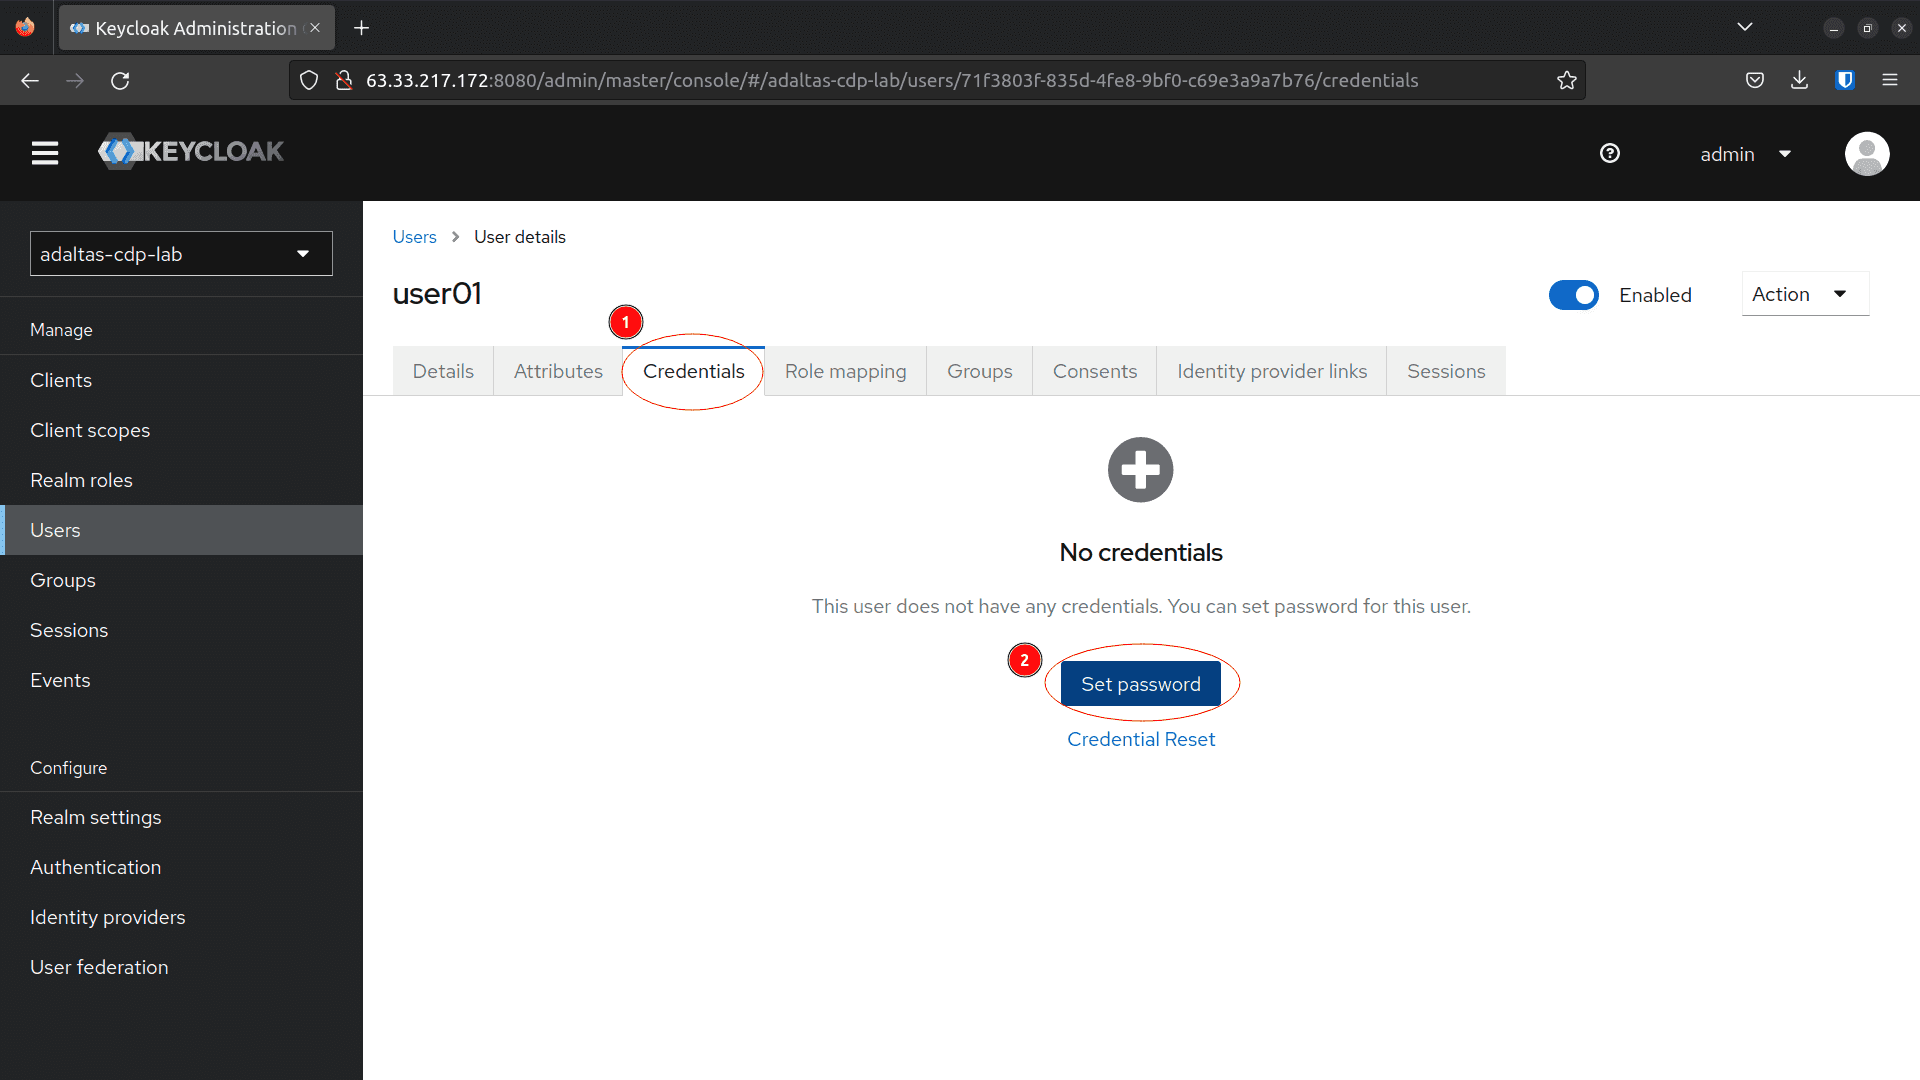
-
To set the password, navigate to Credentials, fill the values an click Set Password:
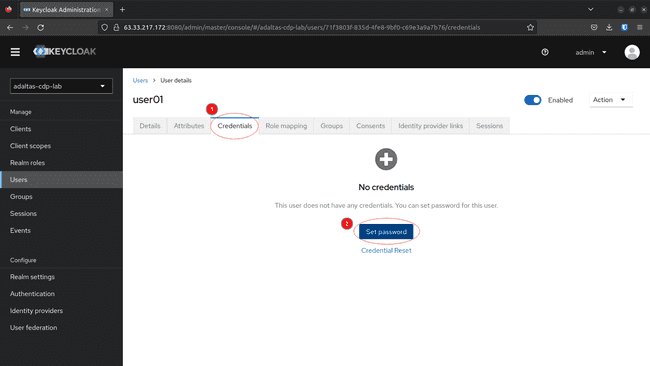
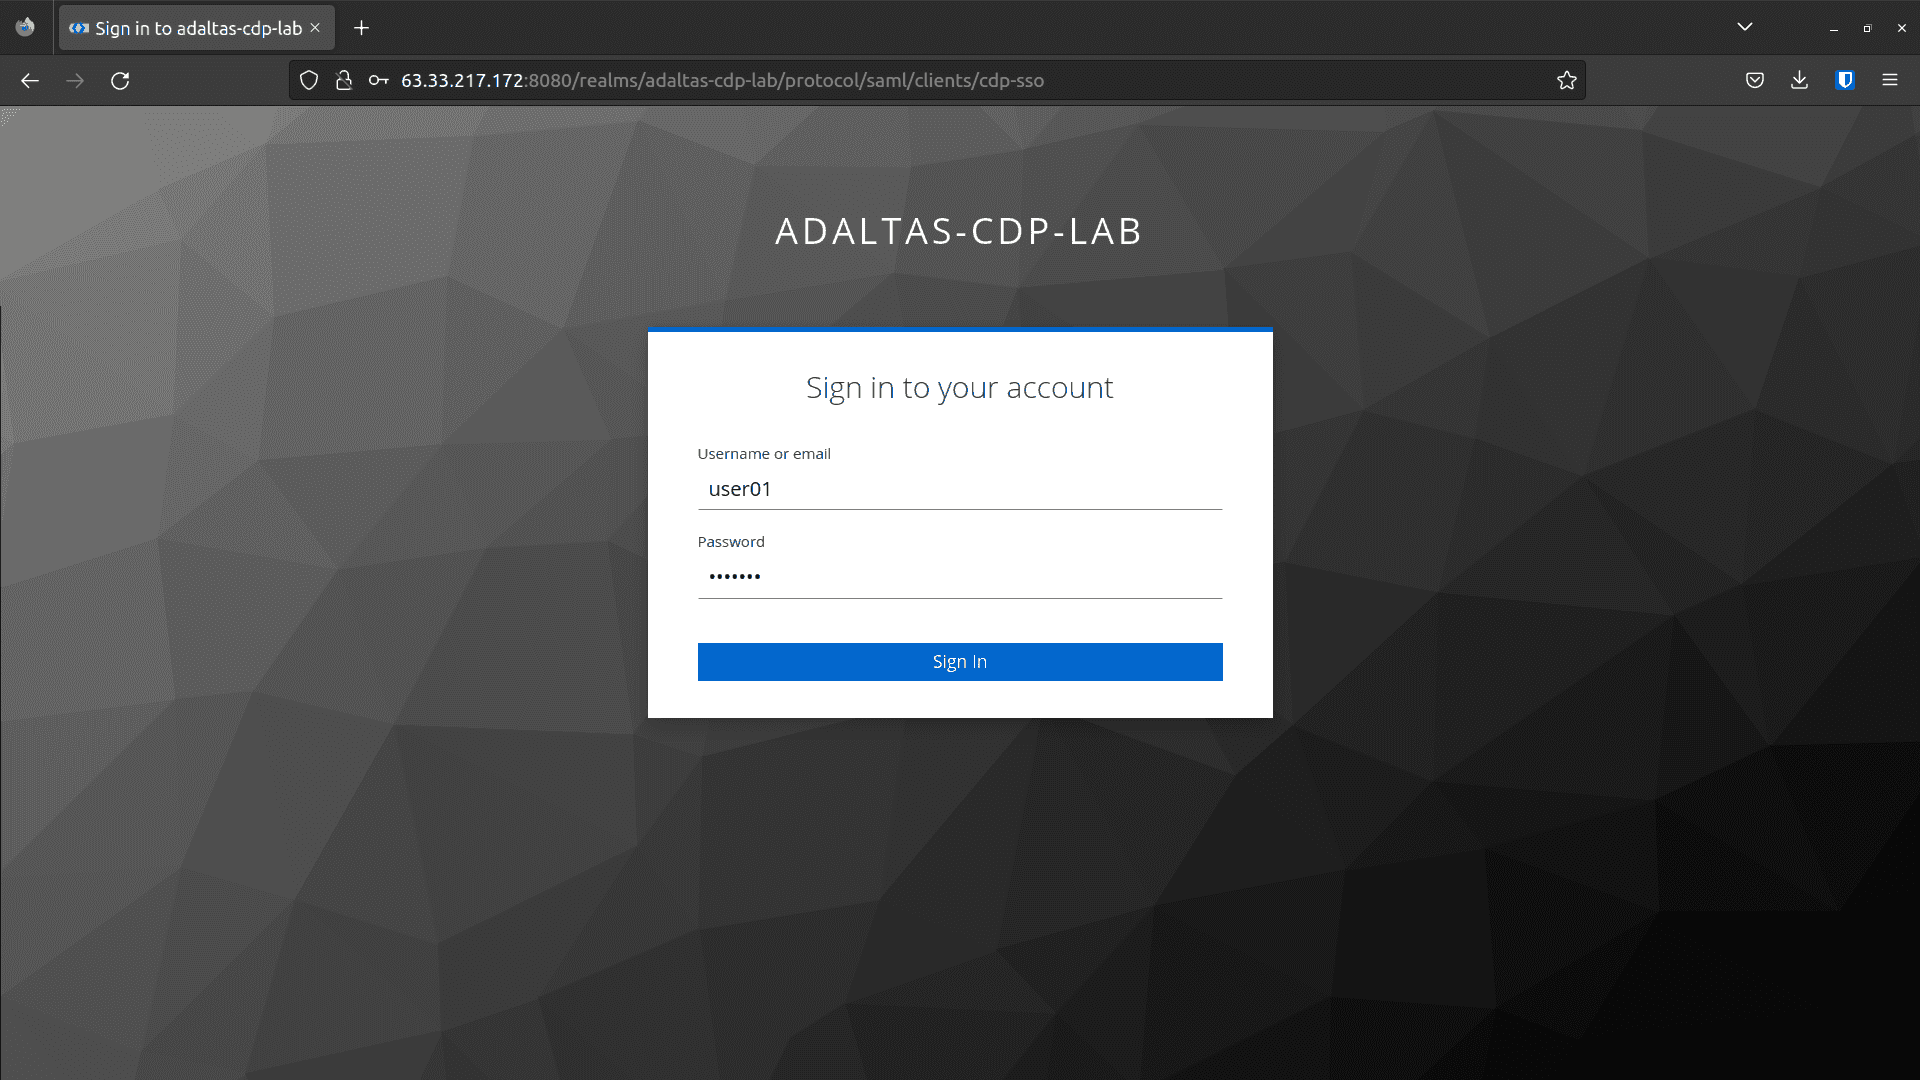
-
Test the user by login:

Configuration Using the Terminal
This approach is for users more familiar with Keycloak or those who want an automated process.
As you may have already noticed, configuring Keycloak using the web interface can be tedious and a bit long. Especially the user creation task, for those who deal with big groups or even just for testing purposes, the web interface is not the best idea.
The configuration via the terminal requires the following steps:
- Login and Check EC2 Requirements
- Create Credentials and Login to Realm Master
- Create the Realm and Download SAML Metadata
- Registering Keycloak in CDP
- Create CDP Client
- Create Users
- Create Group and Add Users
Login and Check EC2 Requirements
As we mentioned before, we are assuming that Keycloak is running using Docker Compose on an EC2 instance.
Therefore, here we are going to connect to this EC2 instance and go inside the Docker container to execute all the commands.
Local machine:
-
Set EC2 instance required variables:
export PUBLIC_IPV4_DNS=<PUBLIC_IPV4_DNS> export AWS_SSH_KEY=<AWS_SSH_KEY> # Default username for Ubuntu AMI export EC2_USERNAME=ec2-user -
Connect to the EC2 instance and check that the files are there:
ssh -i "~/.ssh/${AWS_SSH_KEY}.pem" ${EC2_USERNAME}@${PUBLIC_IPV4_DNS}
The docker container running and you should have the following layout:
./ubuntu
├── docker-compose.yml
└── kc_config
1 directories, 1 fileNow, we are ready to start the configuration process.
EC2 Instance:
-
Go inside the container:
docker exec -it keycloak bash -
Navigate to the external volume directory:
cd kc_config
Create Credentials and Login to Realm Master
This step creates a truststore credential required to log in to the Realm master via the terminal.
# Path required to use the kcadm.sh script
export PATH=$PATH:/opt/keycloak/bin# Login into the Realm master
kcadm.sh config credentials --server http://localhost:8080/ \
--realm master \
--user $KEYCLOAK_ADMIN \
--password $KEYCLOAK_ADMIN_PASSWORDCreate the Realm and Download SAML Metadata
Now it’s time to register our Realm and get the SAML metadata required to register Keycloak as IdP in CDP.
# Set Realm name
export REALM="adaltas-cdp-lab"
# Set SAML metadata file name
export SAML_FILE=saml_provider.xml
# Create the Realm without SSL required
kcadm.sh create realms \
--set realm=$REALM \
--set enabled=true \
--set sslRequired=none# Download and save the saml metadata
curl \
-k http://localhost:8080/realms/adaltas-cdp-lab/protocol/saml/descriptor \
> $SAML_FILESince we need this file in the next step, use the following command to copy the SAML metadata into your local machine:
scp -i "~/.ssh/${AWS_SSH_KEY}.pem" ${EC2_USERNAME}@${PUBLIC_IPV4_DNS}:/home/${EC2_USERNAME}/kc_config/saml_provider.xml ./Registering Keycloak in CDP
Use the Cloudera web interface to register Keycloak as IdP as described in the web interface approach.
Note: By the time the article was written this process could not be performed via the CDP CLI because the command cdp iam create-saml-provider was not working.
Create CDP Client
In this step, we are going to create the CDP client on Keycloak using the content of cdp_client file and the <ID> generated by CDP from the previous step.
# Set IdP ID generated by CDP in the previous step
export CDP_IdP_ID=<ID>
# Create the client
kcadm.sh create clients --target-realm $REALM -f - << EOF
{
"clientId": "cdp-client",
"surrogateAuthRequired": false,
"enabled": true,
"clientAuthenticatorType": "client-secret",
"redirectUris": [
"https://consoleauth.altus.cloudera.com/saml"
],
"webOrigins": [
"https://consoleauth.altus.cloudera.com"
],
"notBefore": 0,
"bearerOnly": false,
"consentRequired": false,
"standardFlowEnabled": true,
"implicitFlowEnabled": false,
"directAccessGrantsEnabled": false,
"serviceAccountsEnabled": false,
"publicClient": false,
"frontchannelLogout": true,
"protocol": "saml",
"attributes": {
"saml.assertion.signature": "true",
"saml.force.post.binding": "true",
"saml.multivalued.roles": "false",
"saml.encrypt": "false",
"saml_assertion_consumer_url_post": "https://consoleauth.altus.cloudera.com/saml?samlProviderId=${CDP_IdP_ID}",
"saml.server.signature": "true",
"saml_idp_initiated_sso_url_name": "cdp-sso",
"saml.server.signature.keyinfo.ext": "false",
"exclude.session.state.from.auth.response": "false",
"saml.signature.algorithm": "RSA_SHA256",
"saml_force_name_id_format": "false",
"saml.client.signature": "true",
"tls.client.certificate.bound.access.tokens": "false",
"saml.authnstatement": "true",
"display.on.consent.screen": "false",
"saml_name_id_format": "username",
"saml.onetimeuse.condition": "false",
"saml_signature_canonicalization_method": "http://www.w3.org/2001/10/xml-exc-c14n#"
},
"authenticationFlowBindingOverrides": {},
"fullScopeAllowed": true,
"nodeReRegistrationTimeout": -1,
"protocolMappers": [
{
"name": "my-email-id-mapper",
"protocol": "saml",
"protocolMapper": "saml-user-property-mapper",
"consentRequired": false,
"config": {
"attribute.nameformat": "URI Reference",
"user.attribute": "email",
"friendly.name": "my-email-friendly-name",
"attribute.name": "urn:oid:0.9.2342.19200300.100.1.3"
}
},
{
"name": "my-groups-mapper",
"protocol": "saml",
"protocolMapper": "saml-group-membership-mapper",
"consentRequired": false,
"config": {
"single": "true",
"attribute.nameformat": "URI Reference",
"full.path": "false",
"friendly.name": "my-groups-friendly-name",
"attribute.name": "https://altus.cloudera.com/SAML/Attributes/groups"
}
},
{
"name": "my-firstname-mapper",
"protocol": "saml",
"protocolMapper": "saml-user-property-mapper",
"consentRequired": false,
"config": {
"attribute.nameformat": "URI Reference",
"user.attribute": "firstName",
"friendly.name": "my-firstname-friendly-name",
"attribute.name": "https://altus.cloudera.com/SAML/Attributes/firstName"
}
},
{
"name": "my-lastname-mapper",
"protocol": "saml",
"protocolMapper": "saml-user-property-mapper",
"consentRequired": false,
"config": {
"attribute.nameformat": "URI Reference",
"user.attribute": "lastName",
"friendly.name": "my-lastname-friendly-name",
"attribute.name": "https://altus.cloudera.com/SAML/Attributes/lastName"
}
}
],
"defaultClientScopes": [
"web-origins",
"role_list",
"profile",
"roles",
"email"
],
"optionalClientScopes": [
"address",
"phone",
"offline_access",
"microprofile-jwt"
],
"access": {
"view": true,
"configure": true,
"manage": true
}
}
EOFCreate Users
We create the users by reading a csv file with the following format:
Name, LastName, username, emailTherefore, inside your kc_config directory (EC2 or Docker Container) create a csv file with the information of each user.
Note: Review User and group limits and make sure that you do not exceed these limits.
Here is an example:
cat <<EOF > users_list.csv
Tobias, CHAVARRIA, user01, user01@example.com
Albert, KONRAD, user02, user02@example.com
Stephan, BAUM, user03, user03@example.com
EOF
Once this is done, we create the users using the following scripts:
# Set csv file name
export USERS_CSV_FILE=users_list.csv
# Set intial password
export USERS_INITIAL_PASS="Pa55w0rd"
# Function: Create a user and set the password within a Realm
kc_create_user() {
firstname=$1
lastname=$2
username=$3
email=$4
kcadm.sh create users -r $REALM \
-s username=$username \
-s email=$email \
-s firstName=$firstname \
-s lastName=$lastname \
-s enabled=true
kc_set_password $username $USERS_INITIAL_PASS
}# Function: Set a password for a given username within a Realm
kc_set_password() {
username="$1"
initial_pass="$2"
kcadm.sh set-password \
-r $REALM \
--username $username --new-password $initial_pass
}# Function: Reads and creates users using a CSV file as source.
# - CSV file format: "first name, last name, username, email, password"
import_users() {
while read -r line; do
IFS=',' read -ra arr <<< "$line"
kc_create_user ${arr[0]} ${arr[1]} ${arr[2]} ${arr[3]}
done < "$USERS_CSV_FILE"
}# Finally we import the users
import_users $USERS_CSV_FILECreate Group and Add Users
In this step, we are going to create a group and add ALL existing users on the given Realm into this group.
# Set group name
export GROUP_NAME="adaltas-students"
# Set users id list file
export USERS_ID_LIST=users_list
# Create the group
kcadm.sh create groups -r $REALM -s name=$GROUP_NAME# Get GROUP ID
export GROUP_ID=$(kcadm.sh get groups -r $REALM | grep -o '"id" : "[^"]*' | grep -o '[^"]*$')# Export ALL the usersids into the USERS_ID_LIST file
kcadm.sh get users -r $REALM | grep -o '"id" : "[^"]*' | grep -o '[^"]*$' >> $USERS_ID_LIST# Function: Add an user (USER_ID) to a given group (GROUP_ID)
kc_add_group() {
userid="$1"
groupid="$2"
kcadm.sh update users/$userid/groups/$groupid \
-r $REALM \
-s realm=$REALM \
-s userId=$userid \
-s groupId=$groupid \
-n
}
#Function: Add users to a group using a list (USERS_ID_LIST) as source
add_users_group() {
n=1
while read -r userid; do
# reading each line
read -ra arr <<< "$userid"
echo "Updating user: $userid"
n=$((n+1))
kc_add_group $userid $GROUP_ID
done < $USERS_ID_LIST
}# Finally we add ALL the users to the group
add_users_group $USERS_ID_LISTOnce the configuration is done, users can use the following login page to access the Cloudera console:
http://<ec2_public_ip>:8080/realms/<realm>/protocol/saml/clients/cdp-sso
For additional configuration or review, you can also access the Keycloak web interface here:
http://<ec2_public_ip>:8080
Next Step: Configuring Permissions and Ranger policies
By this point, Keycloak has been set up as the identity provider for CDP, and we have created our group of users.
There is still one more layer of configuration needed in the user onboarding process. In the next chapter, we are going to show how to configure the necessary permissions and policies to allow users to exploit our end-to-end architecture.
